
Page 78 - Casting of Angels- Dave Parvin
P. 78
74
While rarely necessary, this does strengthen the side
panels. (See photographs #6 and #7) Only two more steps to
go.
What is now needed is a center section that will cradle
the two sides and hold them in place when the mold is
right side up and empty. The most important thing is that
the center section not be attached to the sides. The easiest
way I have been able to come up with is to cover the side
panels with plastic food wrap. So that the plastic will
stay in place, use a spray-on adhesive. (Photograph #8)
Cover the side panels with plastic wrap and lay strips of
Forton MG soaked batting over the center lengthwise. Be
careful not to make the center section so wide that it
wraps around into the undercuts locking it into pace.
(Photograph #9 Since it is from the bottom or leg end of
the mold that the center section will be lifted off, I
strengthen the end by adding a second layer of cloth
about four inches wide. Expect to run out of Forton MG
before you finish the center section. I usually have to mix
another pound of VF-812 with twice that volume in
powders.
A real advantage to a mother mold made of cotton
batting and Forton MG is weight. The total weight of the
three parts of this mother mold in less than 13 pounds. A
plaster mold would have been many times heavier. In most
places, this mold is only bout 1/8" thick and yet is quite
strong.
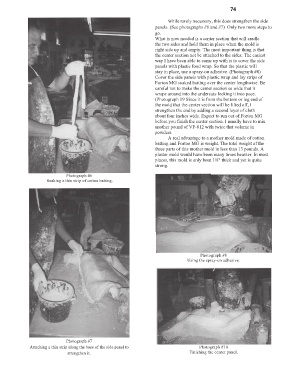
Photograph #6
Soaking a thin strip of cotton batting.
Photograph #8
Using the spray-on adhesive.
Photograph #7
Attaching a thin strip along the base of the side panel to Photograph #10
strengthen it. Finishing the center panel.