
Page 81 - Manual - Well Fixed Assets and Barcode Asset Checking
P. 81
WELL - FIXED ASSET
6. If Master Code is required to be used, it will define a code prior to entering
transactions of the program. There are 4 Setup items, including Chart of Account, Location, Cost
Center, and Class Code. If you want to change that code, you need to click “Setup -> Location” and
insert the Asset Transfer information or click “Privilege Correction” by zooming in that code and
change it immediately. However, you are never suggested to delete your original Master Code as it
may cause error to the program.
7. You have to be very careful when processing the Revaluation and Breakdown
functions. Remember that you cannot undo any incorrect information.
10. Procedures of Construction in Progress (CIP) and Work In Progress (WIP)
Entry
To insert the CIP or WIP information in Well-Fixed Asset, there are 3 major steps
required. However, before mentioning the 3 steps, the Chart of Account is required to initially possess
the CIP or WIP account. You can go to “Setup -> Chart of Account”. It is compulsory for you to
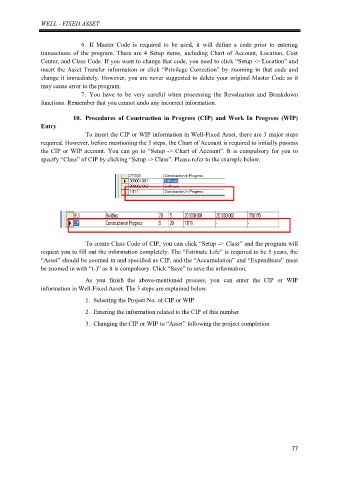
specify “Class” of CIP by clicking “Setup -> Class”. Please refer to the example below.
To create Class Code of CIP, you can click “Setup -> Class” and the program will
request you to fill out the information completely. The “Estimate Life” is required to be 5 years, the
“Asset” should be zoomed in and specified as CIP, and the “Accumulation” and “Expenditure” must
be zoomed in with “(-)” as it is compulsory. Click “Save” to save the information.
As you finish the above-mentioned process, you can enter the CIP or WIP
information in Well-Fixed Asset. The 3 steps are explained below.
1. Selecting the Project No. of CIP or WIP
2. Entering the information related to the CIP of this number
3. Changing the CIP or WIP to “Asset” following the project completion
77