Page 815 - Divyank Tyagi
P. 815
|
                                                              AnnotAting with ProjeCt AnD shAreD PArAMeters    781


                             In the following sections, we will discuss how to create both of these parameter types as well
                           as the pros and cons of each.

                           Creating project parameters
                           You can create custom project parameters at any time in the project cycle. Depending on how
                           you create the parameters, you can assign them to one or more element categories within the
                           model. You can also assign them to elements that have already been created or to element
                           categories for elements that you have yet to create.
                             The following steps will allow you to make a custom parameter that can be scheduled but
                           not tagged. For this example, pretend you are working on an existing building and reworking
                           a space. Much of what is onsite will need to be demolished, but you would like to reuse all
                           the elements that are salvageable. As you are documenting the existing conditions, you want
                           to schedule the elements you want to keep. To do this, you’ll make a parameter called Reuse.
                           Continue with the project file from the previous exercise (c18-Dimensions-Start.rvt or
                           c18-Dimensions-Metric-Start.rvt).
                             To add a new project parameter, follow these steps:
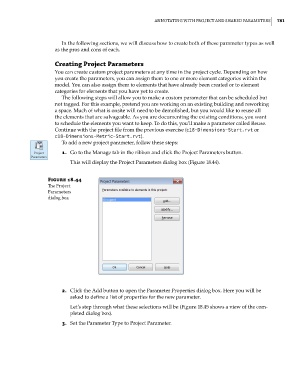
                             1.  Go to the Manage tab in the ribbon and click the Project Parameters button.
                                This will display the Project Parameters dialog box (Figure 18.44).


                        Figure 18.44
                        The Project
                        Parameters
                        dialog box


                             2.  Click the Add button to open the Parameter Properties dialog box. Here you will be
                                asked to define a list of properties for the new parameter.

                                Let’s step through what these selections will be (Figure 18.45 shows a view of the com-
                                pleted dialog box).
                             3.  Set the Parameter Type to Project Parameter.


          c18.indd   781                                                                             5/3/2014   11:56:02 AM

