Page 594 - Icon Ridge Presents ATORN
P. 594
Tool clamp \ Tool presetters and accessories
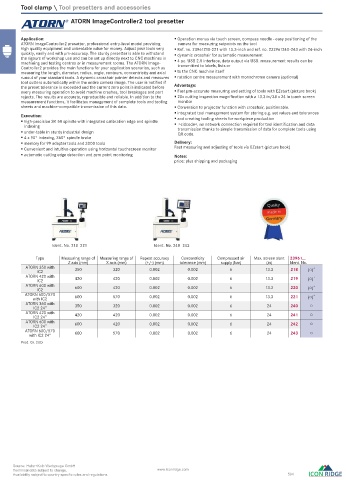
ATORN ImageController2 tool presetter
Application: Operation menus via touch screen, compass needle - easy positioning of the
ATORN ImageController2 presetter, professional entry-level model providing camera for measuring setpoints on the tool
high quality equipment and unbeatable value for money. Adjust your tools very Ref. no. 23961218-221 with 13.3-inch and ref. no. 232961240-243 with 24-inch
quickly, easily and with µm-accuracy. The sturdy presetter is able to withstand dynamic crosshair for automatic measurement
the rigours of workshop use and can be set up directly next to CNC machines in 4 pc. USB 2.0 interface, data output via USB. measurement results can be
machining and testing centres or in measurement rooms. The ATORN Image- transmitted to labels, lists or
Controller2 provides the main functions for your application scenarios, such as
measuring the length, diameter, radius, angle, contours, concentricity and axial to the CNC machine itself
runout of your standard tools. A dynamic crosshair pointer detects and measures rotation centre measurement with monochrome camera (optional)
tool cutters automatically within the entire camera image. The user is notifi ed if Advantage:
the preset tolerance is exceeded and the current zero point is indicated before
every measuring operation to avoid machine crashes, tool breakages and part Fast m-accurate measuring and setting of tools with EZstart (picture book)
rejects. The results are accurate, reproducible and reliable. In addition to the 20x cutting inspection magnifi cation with a 13.3 in/38 x 24 in touch screen
measurement functions, it facilitates management of complete tools and tooling monitor
sheets and machine-compatible transmission of this data. Conversion to projector function with crosshair, positionable.
integrated tool management system for storing e.g. set values and tolerances
Execution:
high-precision SK 50 spindle with integrated calibration edge and spindle and creating tooling sheets for workpiece production
indexing >zidcode<, no network connection required for tool identifi cation and data
under-table in sturdy industrial design transmission thanks to simple transmission of data for complete tools using
QR code.
4 x 90° indexing, 360° spindle brake
memory for 99 adapter tools and 3000 tools Delivery:
Convenient and intuitive operation using horizontal touchscreen monitor Fast measuring and adjusting of tools via EZstart (picture book)
automatic cutting edge detection and zero point monitoring Notes:
price: plus shipping and packaging
Ident. No. 218–221 Ident. No. 240–243
Type Measuring range of Measuring range of Repeat accuracy Concentricity Compressed air Max. screen slant 23961...
Z axis (mm) X axis (mm) (+/-) (mm) tolerance (mm) supply (bar) (in) Ident. No.
ATORN 350 with 350 320 0.002 0.002 6 13.3 218 +
IC2 (○)
ATORN 420 with 420 420 0.002 0.002 6 13.3 219 +
IC2 (○)
ATORN 600 with 600 420 0.002 0.002 6 13.3 220 +
IC2 (○)
ATORN 600/570 600 570 0.002 0.002 6 13.3 221 +
with IC2 (○)
ATORN 350 with 350 320 0.002 0.002 6 24 240 ○
IC2 24”
ATORN 420 with 420 420 0.002 0.002 6 24 241 ○
IC2 24”
ATORN 600 with 600 420 0.002 0.002 6 24 242 ○
IC2 24”
ATORN 600/570 600 570 0.002 0.002 6 24 243 ○
with IC2 24”
Prod. Gr. 2AD
Source: Hahn+Kolb Werkzeuge GmbH
Technical data subject to change. www.iconridge.com
Availability subject to country specific rules and regulations. 594
0820_EN_2018_KERN[21850027]-m.indd 820 12/17/2018 3:34:07 PM

