
Page 122 - Photoshop for Lightroom Users – Scott Kelby 2nd Edition
P. 122
Chapter 5
Composite
Compositing & Blending Multiple Images
Who would have thought that there would be a dozen or more tunes named “Composite”? Moreover, who would have thought that the very first one I
previewed in the iTunes Store (the one by Isotroph) would be a bass drum track followed by some layered synthesizer tracks? This seems to be a theme in
the iTunes Store, but maybe in reality these “bass drum, then weird synth” songs are primarily found on tracks that are obviously named after features in
Photoshop. Hey, it’s certainly possible. So, I started doing searches in the iTunes Store for other Photoshop features and, sure enough, it’s the same “bass
drum, then weird synth” style of music. For example, I listened to a preview of “Healing Brush” by the Unsharp Masks, and it was 9½ minutes of bass
drum followed by a sweeping resonance slider on a synth. I had to buy it. I even gifted copies of it to friends. It’s intoxicating. But then it hit me. I have a
synth. I have four, in fact (a Korg M3, a Korg TR, a classic Roland D-50, and a Roland U-20), and my son has a Yamaha bass drum (among other drums,
but I’m sure he’d loan me that one. After all, how many drums do you really need, right?). Anyway, so I hooked up the synths, put my right foot on the
Yamaha bass drum pedal, and picked some weird sounding patches, then I hit the Record button in the Garage Band app. Now, I don’t want to brag here or
anything, but I made magic. It was like Pandora Radio, the ancient Greek goddess of inhumanely long bass drum tracks, came down from her perch high
atop Mount Zildjian and put this track into my soul. Thus, I turned around and, in one triumphant three-note chord, held continuously for 6 minutes and 18
seconds with a quarter-note bass drum track beneath it, I took her offering and returned it to the world as my sonic gift to the pinna. Sadly, it was rejected
by the iTunes Store for what they called “remarkably explicit lyrics,” but that only happened because at one point during the recording process, my pinky
toe got caught between the bass drum pedal and the rim of the drum and I yelped out a few phrases generally only uttered by Jacksonville Jaguar fans
during another brutal home game loss, and well, it somehow made it on the tape and the rest, as they say, is history. True story.
Select Subject & Select and Mask: Key Technique: Masking Hair
Compositing (taking people off one background and putting them on another, realistically) has become really popular over the past few years because the
process is getting easier and easier, especially when it comes to making tricky selections to things like wind-blown hair. Plus, some AI and machine
learning Adobe has added to Photoshop CC makes it even easier. Don’t let the number of steps here make you think it’s hard to pull off—it has never been
simpler. Here’s how it’s done:
Step One:
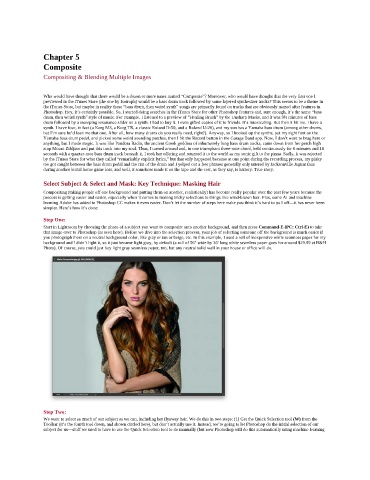
Start in Lightroom by choosing the photo of a subject you want to composite onto another background, and then press Command-E (PC: Ctrl-E) to take
that image over to Photoshop (as seen here). Before we dive into the selection process, your job of selecting someone off the background is much easier if
you photograph them on a neutral background color, like gray or tan or beige, etc. In this example, I used a roll of inexpensive white seamless paper for my
background and I didn’t light it, so it just became light gray, by default (a roll of 56" wide by 36' long white seamless paper goes for around $29.99 at B&H
Photo). Of course, you could just buy light gray seamless paper, too, but any neutral solid wall in your house or office will do.
Step Two:
We want to select as much of our subject as we can, including her flyaway hair. We do this in two steps: (1) Get the Quick Selection tool (W) from the
Toolbar (it’s the fourth tool down, and shown circled here), but don’t actually use it. Instead, we’re going to let Photoshop do the initial selection of our
subject for us—stuff we used to have to use the Quick Selection tool to do manually (but now Photoshop will do this automatically using machine learning