
Page 117 - Photoshop for Lightroom Users – Scott Kelby 2nd Edition
P. 117
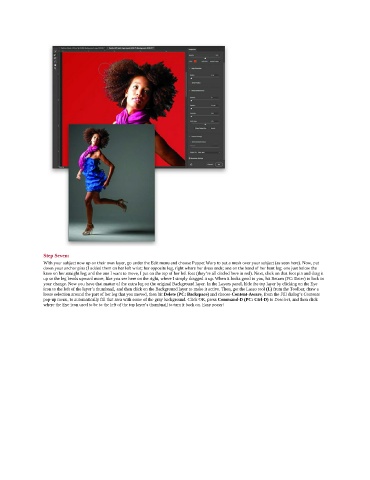
Step Seven:
               With your subject now up on their own layer, go under the Edit menu and choose Puppet Warp to put a mesh over your subject (as seen here). Now, put
               down your anchor pins (I added them on her left wrist; her opposite leg, right where her dress ends; one on the bend of her bent leg; one just below the
               knee on her straight leg; and the one I want to move, I put on the top of her left foot (they’re all circled here in red). Next, click on that foot pin and drag it
               up so the leg bends upward more, like you see here on the right, where I simply dragged it up. When it looks good to you, hit Return (PC: Enter) to lock in
               your change. Now you have that matter of the extra leg on the original Background layer. In the Layers panel, hide the top layer by clicking on the Eye
               icon to the left of the layer’s thumbnail, and then click on the Background layer to make it active. Then, get the Lasso tool (L) from the Toolbar, draw a
               loose selection around the part of her leg that you moved, then hit Delete (PC: Backspace) and choose Content-Aware, from the Fill dialog’s Contents
               pop-up menu, to automatically fill that area with some of the gray background. Click OK, press Command-D (PC: Ctrl-D) to Deselect, and then click
               where the Eye icon used to be to the left of the top layer’s thumbnail to turn it back on. Easy peasy!