
Page 119 - Photoshop for Lightroom Users – Scott Kelby 2nd Edition
P. 119
cover stuff (Chapter 8). But, anyway, it just seems like it should be here (it’s such an easy fix that if you learn it now, you’ll wind up using it in other
places).
Step One:
In this instance, my seamless roll of red paper wasn’t wide enough to cover my background stands and other gear, so we’re going to use a quick retouching
trick to extend the background. Get the Rectangular Marquee tool (M) from the Toolbar (by the way, this gets my vote for the “This tool should be
renamed” annual award. Just change the word “Marquee” to “Selection,” and then we’ll all know what it means). Anyway, get that tool and click-and-drag
out a tall selection in a clean area of background right near where the problem is. Now, press Command-T (PC: Ctrl-T) to bring up the Free Transform
bounding box around your selected area. You can see here it added control points to the corners and at the center of each side (we learned about Free
Transform back in Chapter 1).
Step Two:
When you move your cursor over a control point, if you look really closely, you can see that it turns into a two-headed arrow, which you can drag in or out.
So, to cover all the junk you see on the right, behind my red seamless paper, just grab the right center control point and simply stretch that selected area out,
right off the edge of the image, so it covers over that stuff (as shown here). When you’re done with this side, just click anywhere outside the bounding box
to lock in your transformation, then press Command-D (PC: Ctrl-D) to Deselect your rectangular selection. Okay, now let’s fix the other side.
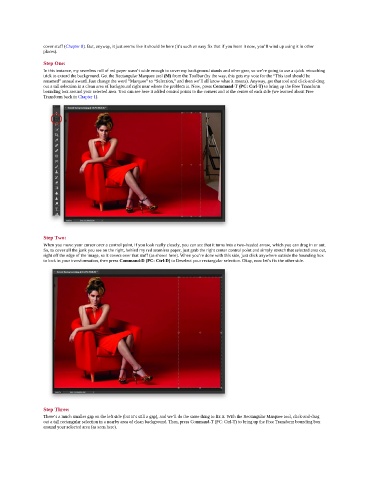
Step Three:
There’s a much smaller gap on the left side (but it’s still a gap), and we’ll do the same thing to fix it. With the Rectangular Marquee tool, click-and-drag
out a tall rectangular selection in a nearby area of clean background. Then, press Command-T (PC: Ctrl-T) to bring up the Free Transform bounding box
around your selected area (as seen here).