
Page 113 - Photoshop for Lightroom Users – Scott Kelby 2nd Edition
P. 113
put my selected subject up on her own layer. (Note: We’ll look at how to make selections like this more in Chapter 5. It’s way easier than you’d think.)
With your subject on their own layer, use the Clone Stamp tool (S) to get rid of them on the Background layer by Option-clicking (PC: Alt-clicking) on a
background area to sample it, then painting over the subject to clone them away (here, I only cloned away her top half, since we’re only adjusting that
area).
Step Two:
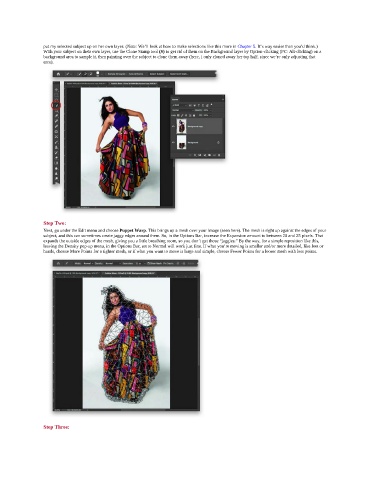
Next, go under the Edit menu and choose Puppet Warp. This brings up a mesh over your image (seen here). The mesh is right up against the edges of your
subject, and this can sometimes create jaggy edges around them. So, in the Options Bar, increase the Expansion amount to between 20 and 25 pixels. That
expands the outside edges of the mesh, giving you a little breathing room, so you don’t get those “jaggies.” By the way, for a simple reposition like this,
leaving the Density pop-up menu, in the Options Bar, set to Normal will work just fine. If what you’re moving is smaller and/or more detailed, like feet or
hands, choose More Points for a tighter mesh, or if what you want to move is large and simple, choose Fewer Points for a looser mesh with less points.
Step Three: