Page 109 - Photoshop for Lightroom Users – Scott Kelby 2nd Edition
P. 109
Step Two:
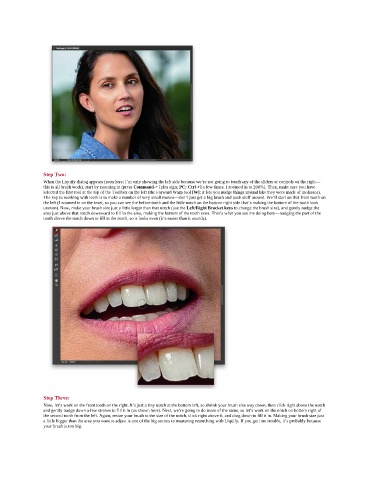
               When the Liquify dialog appears (seen here; I’m only showing the left side because we’re not going to touch any of the sliders or controls on the right—
               this is all brush work), start by zooming in (press Command-+ [plus sign; PC: Ctrl-+] a few times. I zoomed in to 200%). Then, make sure you have
               selected the first tool at the top of the Toolbox on the left (the Forward Warp tool [W]; it lets you nudge things around like they were made of molasses).
               The key to working with teeth is to make a number of very small moves—don’t just get a big brush and push stuff around. We’ll start on that front tooth on
               the left (I zoomed in on the inset, so you can see the before tooth and the little notch on the bottom right side that’s making the bottom of the tooth look
               uneven). Now, make your brush size just a little larger than that notch (use the Left/Right Bracket keys to change the brush size), and gently nudge the
               area just above that notch downward to fill in the area, making the bottom of the tooth even. That’s what you see me doing here—nudging the part of the
               tooth above the notch down to fill in the notch, so it looks even (it’s easier than it sounds).


               Step Three:
               Now, let’s work on the front tooth on the right. It’s just a tiny notch at the bottom left, so shrink your brush size way down, then click right above the notch
               and gently nudge down a few strokes to fill it in (as shown here). Next, we’re going to do more of the same, so let’s work on the notch on bottom right of
               the second tooth from the left. Again, resize your brush to the size of the notch, click right above it, and drag down to fill it in. Making your brush size just
               a little bigger than the area you want to adjust is one of the big secrets to mastering retouching with Liquify. If you get into trouble, it’s probably because
               your brush is too big.

