Page 104 - Photoshop for Lightroom Users – Scott Kelby 2nd Edition
P. 104
Step Five:
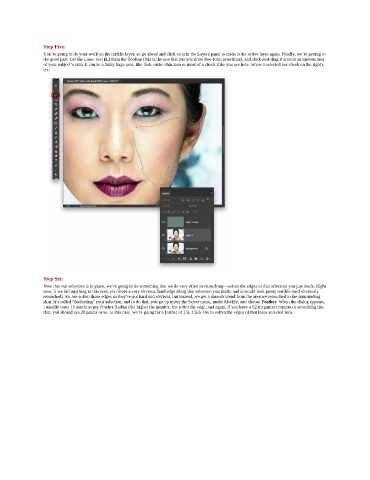
               You’re going to do your work on the middle layer, so go ahead and click on it in the Layers panel to make it the active layer again. Finally, we’re getting to
               the good part. Get the Lasso tool (L) from the Toolbar (this is the one that lets you draw free-form selections), and click-and-drag it around an uneven area
               of your subject’s skin. It can be a fairly large area, like their entire chin area or most of a cheek (like you see here, where I selected her cheek on the right),
               etc.


               Step Six:
               Now that our selection is in place, we’re going to do something that we do very often in retouching—soften the edges of that selection you just made. Right
               now, if we did anything to this area, you’d see a very obvious, hard edge along that selection you made, and it would look pretty terrible (and obviously
               retouched). So, we soften those edges so they’re not hard and obvious, but instead, we get a smooth blend from the area we retouched to the surrounding
               skin. It’s called “feathering” your selection, and to do that, you go up under the Select menu, under Modify, and choose Feather. When the dialog appears,
               I usually enter 15 pixels as my Feather Radius (the higher the number, the softer the edge, and again, if you have a 52-megapixel camera or something like
               that, you should use 20 pixels or so. In this case, we’re going for a feather of 15). Click OK to soften the edges of that lasso-selected area.

