Page 99 - Photoshop for Lightroom Users – Scott Kelby 2nd Edition
P. 99
Step Two:
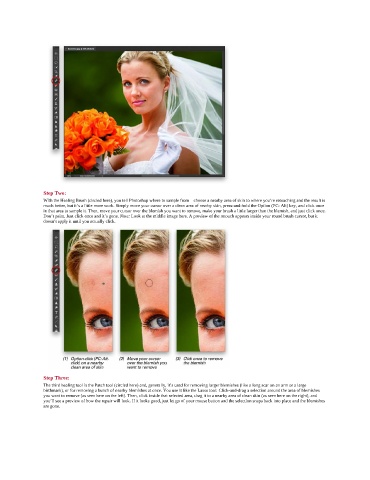
               With the Healing Brush (circled here), you tell Photoshop where to sample from—choose a nearby area of skin to where you’re retouching and the result is
               much better, but it’s a little more work. Simply move your cursor over a clean area of nearby skin, press-and-hold the Option (PC: Alt) key, and click once
               in that area to sample it. Then, move your cursor over the blemish you want to remove, make your brush a little larger than the blemish, and just click once.
               Don’t paint. Just click once and it’s gone. Note: Look at the middle image here. A preview of the retouch appears inside your round brush cursor, but it
               doesn’t apply it until you actually click.


               Step Three:
               The third healing tool is the Patch tool (circled here) and, generally, it’s used for removing larger blemishes (like a long scar on an arm or a large
               birthmark), or for removing a bunch of nearby blemishes at once. You use it like the Lasso tool: Click-and-drag a selection around the area of blemishes
               you want to remove (as seen here on the left). Then, click inside that selected area, drag it to a nearby area of clean skin (as seen here on the right), and
               you’ll see a preview of how the repair will look. If it looks good, just let go of your mouse button and the selection snaps back into place and the blemishes
               are gone.

