
Page 184 - Photoshop for Lightroom Users – Scott Kelby 2nd Edition
P. 184
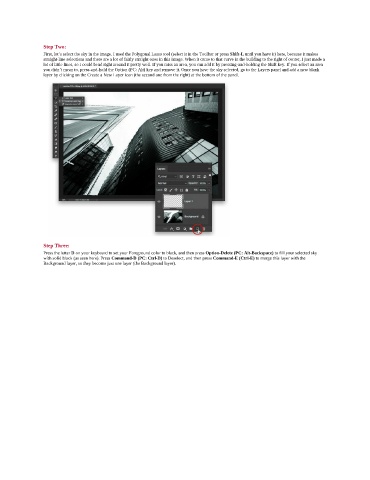
Step Two:
               First, let’s select the sky in the image. I used the Polygonal Lasso tool (select it in the Toolbar or press Shift-L until you have it) here, because it makes
               straight-line selections and there are a lot of fairly straight ones in this image. When it came to that curve in the building to the right of center, I just made a
               lot of little lines, so I could bend right around it pretty well. If you miss an area, you can add it by pressing-and-holding the Shift key. If you select an area
               you didn’t mean to, press-and-hold the Option (PC: Alt) key and remove it. Once you have the sky selected, go to the Layers panel and add a new blank
               layer by clicking on the Create a New Layer icon (the second one from the right) at the bottom of the panel.


               Step Three:
               Press the letter D on your keyboard to set your Foreground color to black, and then press Option-Delete (PC: Alt-Backspace) to fill your selected sky
               with solid black (as seen here). Press Command-D (PC: Ctrl-D) to Deselect, and then press Command-E (Ctrl-E) to merge this layer with the
               Background layer, so they become just one layer (the Background layer).