
Page 186 - Photoshop for Lightroom Users – Scott Kelby 2nd Edition
P. 186
Step Five:
We’re going to change the layer blend mode of this all-black layer to a mode that looks good with our image, and makes it look dark and dramatic, but with
a little bit of light still falling on the buildings. In this case (and in most cases I’ve seen), it’s Overlay. You’ll know which one looks best by going near the
top left of the Layers panel, clicking on the layer blend mode pop-up menu, and moving your cursor down the menu of blend modes. As you move over
each one, you’ll see a live preview onscreen. Here’s how the image looks when changed to Overlay. We’re starting to get “the look” we’re after. Now,
merge this layer with the Background layer by pressing Command-E (PC: Ctrl-E) again.
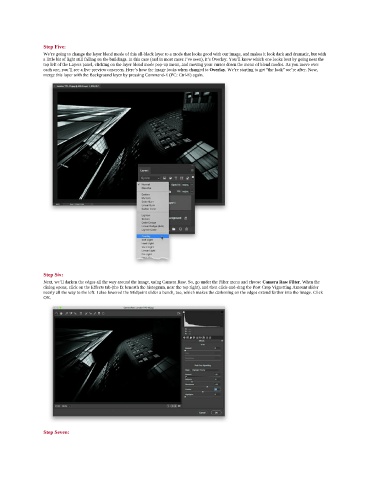
Step Six:
Next, we’ll darken the edges all the way around the image, using Camera Raw. So, go under the Filter menu and choose Camera Raw Filter. When the
dialog opens, click on the Effects tab (the fx beneath the histogram, near the top right), and then click-and-drag the Post Crop Vignetting Amount slider
nearly all the way to the left. I also lowered the Midpoint slider a bunch, too, which makes the darkening on the edges extend farther into the image. Click
OK.
Step Seven: