
Page 191 - Photoshop for Lightroom Users – Scott Kelby 2nd Edition
P. 191
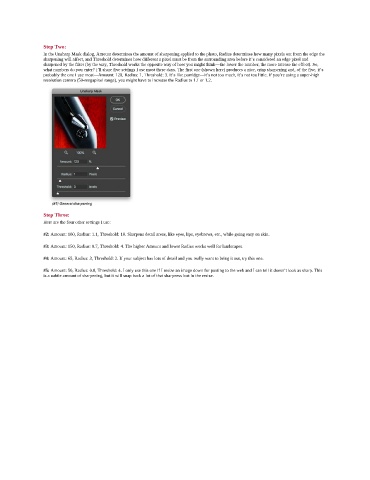
Step Two:
               In the Unsharp Mask dialog, Amount determines the amount of sharpening applied to the photo, Radius determines how many pixels out from the edge the
               sharpening will affect, and Threshold determines how different a pixel must be from the surrounding area before it’s considered an edge pixel and
               sharpened by the filter (by the way, Threshold works the opposite way of how you might think—the lower the number, the more intense the effect). So,
               what numbers do you enter? I’ll share five settings I use most these days. The first one (shown here) produces a nice, crisp sharpening and, of the five, it’s
               probably the one I use most—Amount: 120, Radius: 1, Threshold: 3. It’s like porridge—it’s not too much, it’s not too little. If you’re using a super-high
               resolution camera (50-megapixel range), you might have to increase the Radius to 1.1 or 1.2.


               Step Three:
               Here are the four other settings I use:
               #2: Amount: 100, Radius: 1.1, Threshold: 10. Sharpens detail areas, like eyes, lips, eyebrows, etc., while going easy on skin.
               #3: Amount: 150, Radius: 0.7, Threshold: 4. The higher Amount and lower Radius works well for landscapes.

               #4: Amount: 65, Radius: 3, Threshold: 2. If your subject has lots of detail and you really want to bring it out, try this one.
               #5: Amount: 50, Radius: 0.8, Threshold: 4. I only use this one if I resize an image down for posting to the web and I can tell it doesn’t look as sharp. This
               is a subtle amount of sharpening, but it will snap back a lot of that sharpness lost in the resize.