
Page 194 - Photoshop for Lightroom Users – Scott Kelby 2nd Edition
P. 194
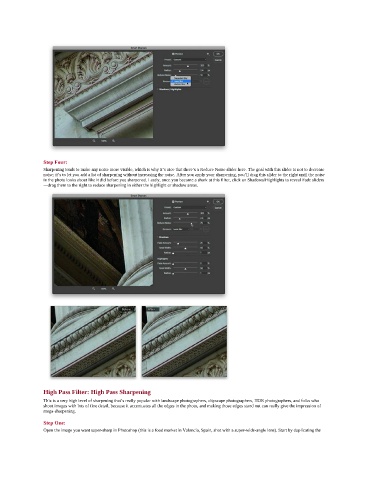
Step Four:
               Sharpening tends to make any noise more visible, which is why it’s nice that there’s a Reduce Noise slider here. The goal with this slider is not to decrease
               noise; it’s to let you add a lot of sharpening without increasing the noise. After you apply your sharpening, you’ll drag this slider to the right until the noise
               in the photo looks about like it did before you sharpened. Lastly, once you become a shark at this filter, click on Shadows/Highlights to reveal Fade sliders
               —drag them to the right to reduce sharpening in either the highlight or shadow areas.


               High Pass Filter: High Pass Sharpening
               This is a very high level of sharpening that’s really popular with landscape photographers, cityscape photographers, HDR photographers, and folks who
               shoot images with lots of fine detail, because it accentuates all the edges in the photo, and making those edges stand out can really give the impression of
               mega-sharpening.

               Step One:
               Open the image you want super-sharp in Photoshop (this is a food market in Valencia, Spain, shot with a super-wide-angle lens). Start by duplicating the