
Page 195 - Photoshop for Lightroom Users – Scott Kelby 2nd Edition
P. 195
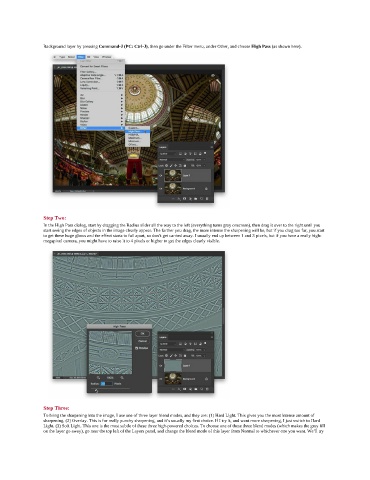
Background layer by pressing Command-J (PC: Ctrl-J), then go under the Filter menu, under Other, and choose High Pass (as shown here).


               Step Two:
               In the High Pass dialog, start by dragging the Radius slider all the way to the left (everything turns gray onscreen), then drag it over to the right until you
               start seeing the edges of objects in the image clearly appear. The farther you drag, the more intense the sharpening will be, but if you drag too far, you start
               to get these huge glows and the effect starts to fall apart, so don’t get carried away. I usually end up between 1 and 3 pixels, but if you have a really high-
               megapixel camera, you might have to raise it to 4 pixels or higher to get the edges clearly visible.


               Step Three:
               To bring the sharpening into the image, I use one of three layer blend modes, and they are: (1) Hard Light. This gives you the most intense amount of
               sharpening. (2) Overlay. This is for really punchy sharpening, and it’s usually my first choice. If I try it, and want more sharpening, I just switch to Hard
               Light. (3) Soft Light. This one is the most subtle of these three high-powered choices. To choose one of these three blend modes (which makes the gray fill
               on the layer go away), go near the top left of the Layers panel, and change the blend mode of this layer from Normal to whichever one you want. We’ll try