
Page 200 - Photoshop for Lightroom Users – Scott Kelby 2nd Edition
P. 200
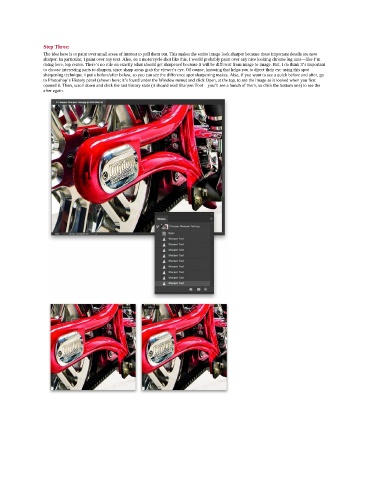
Step Three:
               The idea here is to paint over small areas of interest to pull them out. This makes the entire image look sharper because these important details are now
               sharper. In particular, I paint over any text. Also, on a motorcycle shot like this, I would probably paint over any nice looking chrome lug nuts—like I’m
               doing here, top center. There’s no rule on exactly what should get sharpened because it will be different from image to image. But, I do think it’s important
               to choose interesting parts to sharpen, since sharp areas grab the viewer’s eye. Of course, knowing that helps you to direct their eye using this spot
               sharpening technique. I put a before/after below, so you can see the difference spot sharpening makes. Also, if you want to see a quick before and after, go
               to Photoshop’s History panel (shown here; it’s found under the Window menu) and click Open, at the top, to see the image as it looked when you first
               opened it. Then, scroll down and click the last history state (it should read Sharpen Tool—you’ll see a bunch of them, so click the bottom one) to see the
               after again.