
Page 205 - Photoshop for Lightroom Users – Scott Kelby 2nd Edition
P. 205
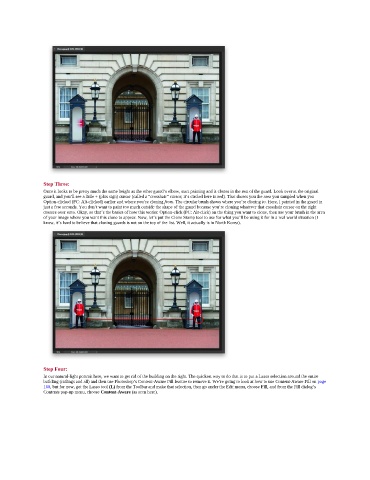
Step Three:
               Once it looks to be pretty much the same height as the other guard’s elbow, start painting and it clones in the rest of the guard. Look over at the original
               guard, and you’ll see a little + (plus sign) cursor (called a “crosshair” cursor; it’s circled here in red). That shows you the area you sampled when you
               Option-clicked (PC: Alt-clicked) earlier and where you’re cloning from. The circular brush shows where you’re cloning to. Here, I painted in the guard in
               just a few seconds. You don’t want to paint too much outside the shape of the guard because you’re cloning whatever that crosshair cursor on the right
               crosses over onto. Okay, so that’s the basics of how this works: Option-click (PC: Alt-click) on the thing you want to clone, then use your brush in the area
               of your image where you want this clone to appear. Now, let’s put the Clone Stamp tool to use for what you’ll be using it for in a real world situation (I
               know, it’s hard to believe that cloning guards is not on the top of the list. Well, it actually is in North Korea).


               Step Four:
               In our natural-light portrait here, we want to get rid of the building on the right. The quickest way to do that is to put a Lasso selection around the entire
               building (railings and all) and then use Photoshop’s Content-Aware Fill feature to remove it. We’re going to look at how to use Content-Aware Fill on page
               160, but for now, get the Lasso tool (L) from the Toolbar and make that selection, then go under the Edit menu, choose Fill, and from the Fill dialog’s
               Contents pop-up menu, choose Content-Aware (as seen here).