
Page 37 - Learning How to Photograph with your DSLR Camera 2nd Edition Jan 2021
P. 37
Lesson 6: Focusing Like a Pro
Having a tack sharp image is usually the goal in photography. In some instances, for
creative purposes, some photographers may want softness or blur.
Because of the variety of camera manufacturers and the systems they use, it is
impossible for me to cover each one. Instead, since I am a current Nikon user and have
used Canon in the past, I will be referring to these two popular makes throughout.
The principles will be the same regardless of the DSLR you own, but you may need to
get into your user manual to find those settings and features.
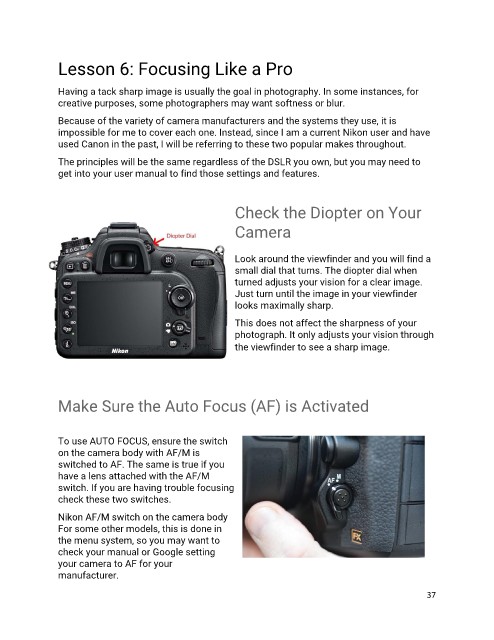
Check the Diopter on Your
Camera
Look around the viewfinder and you will find a
small dial that turns. The diopter dial when
turned adjusts your vision for a clear image.
Just turn until the image in your viewfinder
looks maximally sharp.
This does not affect the sharpness of your
photograph. It only adjusts your vision through
the viewfinder to see a sharp image.
Make Sure the Auto Focus (AF) is Activated
To use AUTO FOCUS, ensure the switch
on the camera body with AF/M is
switched to AF. The same is true if you
have a lens attached with the AF/M
switch. If you are having trouble focusing
check these two switches.
Nikon AF/M switch on the camera body
For some other models, this is done in
the menu system, so you may want to
check your manual or Google setting
your camera to AF for your
manufacturer.
37