
Page 35 - Learning How to Photograph with your DSLR Camera 2nd Edition Jan 2021
P. 35
A tripod works much better most times. This helps eliminate any shake that may cause
the images not to line up precisely. It is best to use a remote to trigger your camera for
each shot, but you can still activate the shutter by a soft press on the shutter release
button if you do not have one.
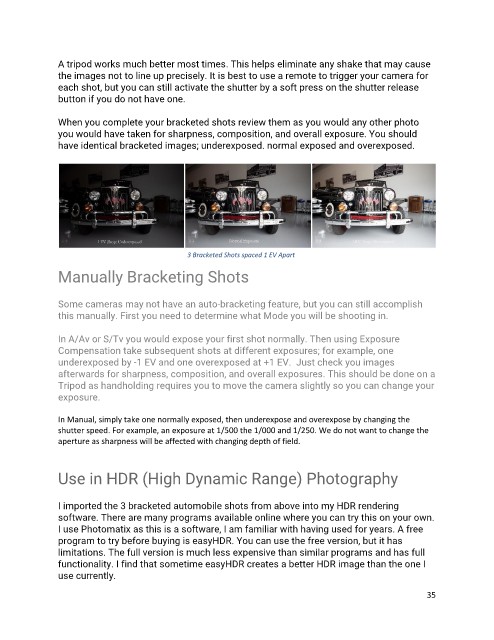
When you complete your bracketed shots review them as you would any other photo
you would have taken for sharpness, composition, and overall exposure. You should
have identical bracketed images; underexposed. normal exposed and overexposed.
3 Bracketed Shots spaced 1 EV Apart
Manually Bracketing Shots
Some cameras may not have an auto-bracketing feature, but you can still accomplish
this manually. First you need to determine what Mode you will be shooting in.
In A/Av or S/Tv you would expose your first shot normally. Then using Exposure
Compensation take subsequent shots at different exposures; for example, one
underexposed by -1 EV and one overexposed at +1 EV. Just check you images
afterwards for sharpness, composition, and overall exposures. This should be done on a
Tripod as handholding requires you to move the camera slightly so you can change your
exposure.
In Manual, simply take one normally exposed, then underexpose and overexpose by changing the
shutter speed. For example, an exposure at 1/500 the 1/000 and 1/250. We do not want to change the
aperture as sharpness will be affected with changing depth of field.
Use in HDR (High Dynamic Range) Photography
I imported the 3 bracketed automobile shots from above into my HDR rendering
software. There are many programs available online where you can try this on your own.
I use Photomatix as this is a software, I am familiar with having used for years. A free
program to try before buying is easyHDR. You can use the free version, but it has
limitations. The full version is much less expensive than similar programs and has full
functionality. I find that sometime easyHDR creates a better HDR image than the one I
use currently.
35