
Page 34 - Learning How to Photograph with your DSLR Camera 2nd Edition Jan 2021
P. 34
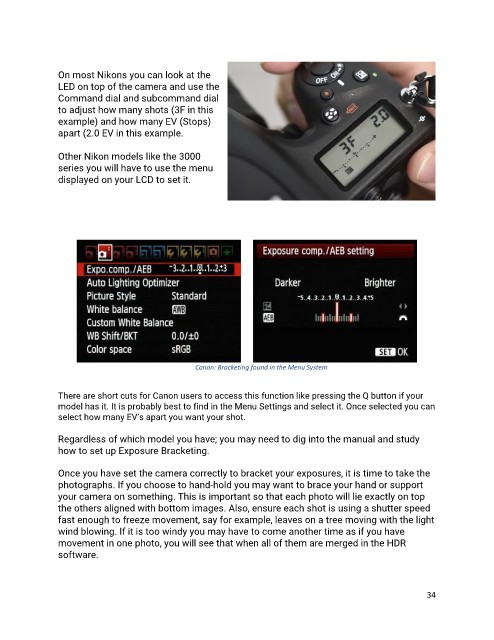
On most Nikons you can look at the
               LED on top of the camera and use the
               Command dial and subcommand dial
               to adjust how many shots (3F in this
               example) and how many EV (Stops)
               apart (2.0 EV in this example.

               Other Nikon models like the 3000
               series you will have to use the menu
               displayed on your LCD to set it.


                                                 Canon: Bracketing found in the Menu System


               There are short cuts for Canon users to access this function like pressing the Q button if your
               model has it. It is probably best to find in the Menu Settings and select it. Once selected you can
               select how many EV’s apart you want your shot.

               Regardless of which model you have; you may need to dig into the manual and study
               how to set up Exposure Bracketing.

               Once you have set the camera correctly to bracket your exposures, it is time to take the
               photographs. If you choose to hand-hold you may want to brace your hand or support
               your camera on something. This is important so that each photo will lie exactly on top
               the others aligned with bottom images. Also, ensure each shot is using a shutter speed
               fast enough to freeze movement, say for example, leaves on a tree moving with the light
               wind blowing. If it is too windy you may have to come another time as if you have
               movement in one photo, you will see that when all of them are merged in the HDR
               software.


                                                                                                           34