
Page 52 - The Decorative Painter - Fall 2019
P. 52
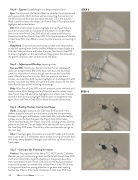
Step 4 – Cygnets: Establishing the underpainting and form.
Eyes: Continue with the Verithin Black to establish the shape around each eye and bill of both birds as well as connecting the tear duct to the bill and tiny folds under and above the eyes. Fill in the eye with Black, careful to retain the shape. Use French Grey 10% to place small highlights behind and below.
Bill: With small circular motions highlight the tip of each bill and around the nose holes as indicated on the pattern in Ginger Root,
then cover with French Grey 50% which will create a soft blue tint. Underline the bills in French Grey 50%. Fill in the remainder of the bills in Cool Grey 90%, then Black to cover, but low pressure, connecting to the eye.
Body/Head: Only the front bird’s body is visible, with little brother on the left peeking over. Softly use Peach Beige to create cheeks and little skin folds just above and below the eyes. Use French Grey 10% to draw in highlights on the wet feathers (large pieces front/center) in the growth direction, then strokes across the body.
Step 5 – Softening and Blending: Layering is key.
Eyes and Bills: Dip the no. 2 brush into the thinner, dabbing off excess on a paper towel. Blend the eyes, tear duct and bill, being careful to stay within the lines, but go over the tips and nose hole areas. Allow to dry a few minutes. With low pressure and short strokes, use Cool Grey 50% to place highlights on the bridge of the bill and the nose hole and White to restore the water drops over the nose hole. Burnish eye and bill including all markings.
Body: With French Grey 50% and soft pressure, cover the body and head to cover all the background and blend where the values meet. Use French Grey 10% add some highlights on the faces near the eye and bill of both birds and highlight feather down on brightest points again. Then use French Grey 50% to blend where the values meet.
Step 6 – Building Shadows, Contrast and Shape
Darks: Using light pressure, use Cool Grey 90% to work in the darkest shadows around the entire piece, under the whitest whites, between his fingers and feathers, under both bills, and make feather strokes across the body between the French Grey 10% strokes.
Cover head and body with French Grey 50%, avoiding whites. Use low pressure and the no. 2 brush loaded with odorless thinner to paint all the Cool Grey 90% areas. This will dry a few minutes while you go to the next step.
Glow: Creating a glow of sunshine around both heads and the bird’s back is done with curved feather down strokes curving across the bird with a very sharp Eggshell. Stronger color will show up where there is fresh paper.
Step 7 – Coming to life: Finalizing the realism
Feathers: The paper will still be damp. DO NOT use the Colorless Blender yet, just continue to go back and forth with French Grey 50% and French Grey 10% to layer the feathers in the growth direction, then more pressure with French Grey 50% on the body and head to ensure all the paper is covered. Use a sharp French Grey 10% all over in the growth direction, paying attention to go back over existing feather tips. Place a little harder shadow(s) in Cool Grey 90% then
50 TheDecorativePainter • FALL 2019
STEP 3
  STEP 4
