
Page 85 - The Decorative Painter - Fall 2019
P. 85
STEP-BY-STEPS
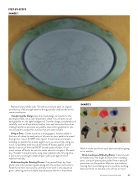
IMAGE 1
Replace lid and shake well. This will reconstitute paint to original consistency. Add enough water to bring partially used bottles to the same consistency.
IMAGE 2
Transferring the Design: Use the inked design to transfer to the painting surface, not a color placement sheet. You will want to use dark graphite on this light background. Transfer design completely and carefully, such as all eye detail, feather lines and leaves and branches, making transfer as accurate as possible. Use artist’s graphite for oils, not the papers created for acrylics that are water soluble.
Using a Drier: Cobalt siccative, a drying agent, may be added in fractions of a drop to each patty of oil paint on your palette to speed drying time. I use it EVERY time I paint. If color does not remain workable on palette for at least eight hours, you are simply using too much. Dip palette knife into drier, bleed off excess against side of bottle, then touch knife tip NEXT to each patty of paint. If too much comes off knife, do not mix entire amount into paint. Mix each tiny “freckle” into paint patty using clean palette knife. Drying time is six hours to overnight, depending on particular pigment and relative humidity.
Understanding the Painting Process: The painted Step-by-Step photos are to be used as a guide along with the written instructions. Read the written instructions carefully, then work in the sequence given, referring to the multiple step sequence shown in the photos.
Work in order and finish each element before going on to another.
Brush Loading and Blending Basics: Color should be loaded onto the bright brushes from a loading zone, a strip of sparse paint pulled from a patty of paint down on the palette. Mixtures are made by moving from one loading zone to another, working back and forth, to achieve a mix of two or more
DECORATIVEPAINTERS.ORG 83
