
Page 1001 - Kitab3DsMax
P. 1001
Chapter 39: Animating with CAT and Creating Crowds
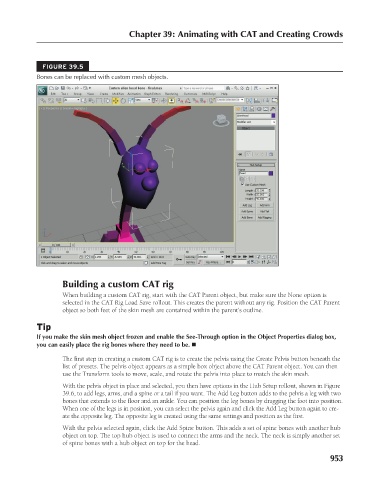
FIGURE 39.5
Bones can be replaced with custom mesh objects.
Building a custom CAT rig
When building a custom CAT rig, start with the CAT Parent object, but make sure the None option is
selected in the CAT Rig Load Save rollout. This creates the parent without any rig. Position the CAT Parent
object so both feet of the skin mesh are contained within the parent’s outline.
Tip
If you make the skin mesh object frozen and enable the See-Through option in the Object Properties dialog box,
you can easily place the rig bones where they need to be. n
The first step in creating a custom CAT rig is to create the pelvis using the Create Pelvis button beneath the
list of presets. The pelvis object appears as a simple box object above the CAT Parent object. You can then
use the Transform tools to move, scale, and rotate the pelvis into place to match the skin mesh.
With the pelvis object in place and selected, you then have options in the Hub Setup rollout, shown in Figure
39.6, to add legs, arms, and a spine or a tail if you want. The Add Leg button adds to the pelvis a leg with two
bones that extends to the floor and an ankle. You can position the leg bones by dragging the foot into position.
When one of the legs is in position, you can select the pelvis again and click the Add Leg button again to cre-
ate the opposite leg. The opposite leg is created using the same settings and position as the first.
With the pelvis selected again, click the Add Spine button. This adds a set of spine bones with another hub
object on top. The top hub object is used to connect the arms and the neck. The neck is simply another set
of spine bones with a hub object on top for the head.
953