
Page 1036 - Kitab3DsMax
P. 1036
Part IX: Working with Characters
apply the Skin Morph modifier on top of the Skin modifier.
3. In the Parameters rollout, click the Add Bone button and select the forearm bone object.
The bone object is added to the Skin Morph list in the Parameters rollout.
4. Select and rotate the forearm bone to the location where the deformation is at its maximum. Then
select the bone object from the list in the Parameters rollout, and click the Create Morph button
in the Local Properties rollout. In the Morph Name window name the morph Bulging bicep.
Tip 2. With the arm skin selected, choose the Modifiers ➪ Animation ➪ Skin Morph menu command to
The forearm bone can be hard to see under the skin, but you can always select the bone using the Select by Name
dialog box, which is opened by pressing H. n
5. In the Local Properties rollout, click the Edit button. This enables the Points subobject mode.
Then enable the Edge Limit option in the Selection rollout, so the vertices on the forearm aren’t
accidentally selected. Drag over the points on the front of the bicep muscle in the Left viewport,
and enable the Use Soft Selection option in the Selection rollout. Set the Radius value to 0.5, and
scale the points to the right in the Left viewport to form a bulge. Click the Edit button again to
exit Edit mode.
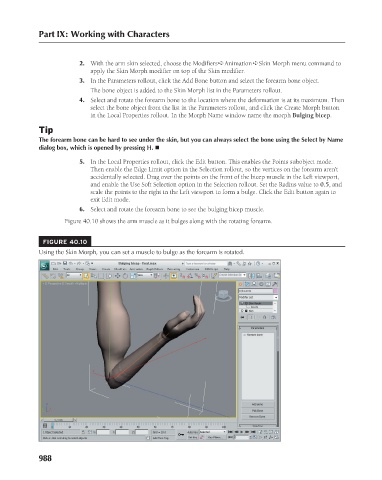
6. Select and rotate the forearm bone to see the bulging bicep muscle.
Figure 40.10 shows the arm muscle as it bulges along with the rotating forearm.
FIGURE 40.10
Using the Skin Morph, you can set a muscle to bulge as the forearm is rotated.
988