
Page 1128 - Kitab3DsMax
P. 1128
Part XI: Advanced Lighting and Rendering
Note
The color bleeding effect doesn’t happen unless the Bounce value is set to 2 or greater. n
When using color bleeding, you also want to enable the Exposure Control to the scene. Exposure Control
is found in the Environment panel (keyboard shortcut, 8), which can be opened with the Rendering ➪
Environment menu command.
Tip
When changing the Exposure Control settings, you can get a quick preview of the scene by clicking the Render
Preview button in the Exposure Control rollout of the Environments and Effects dialog box. n
Cross-Ref
The Exposure Control features are discussed in Chapter 23, “Rendering a Scene and Enabling Quicksilver.” n
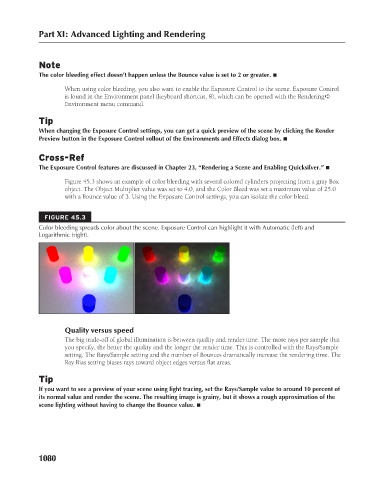
Figure 45.3 shows an example of color bleeding with several colored cylinders projecting from a gray Box
object. The Object Multiplier value was set to 4.0, and the Color Bleed was set a maximum value of 25.0
with a Bounce value of 3. Using the Exposure Control settings, you can isolate the color bleed.
FIGURE 45.3
Color bleeding spreads color about the scene. Exposure Control can highlight it with Automatic (left) and
Logarithmic (right).
Quality versus speed
The big trade-off of global illumination is between quality and render time. The more rays per sample that
you specify, the better the quality and the longer the render time. This is controlled with the Rays/Sample
setting. The Rays/Sample setting and the number of Bounces dramatically increase the rendering time. The
Ray Bias setting biases rays toward object edges versus flat areas.
Tip
If you want to see a preview of your scene using light tracing, set the Rays/Sample value to around 10 percent of
its normal value and render the scene. The resulting image is grainy, but it shows a rough approximation of the
scene lighting without having to change the Bounce value. n
1080