
Page 1133 - Kitab3DsMax
P. 1133
Chapter 45: Working with Advanced Lighting, Light Tracing, and Radiosity
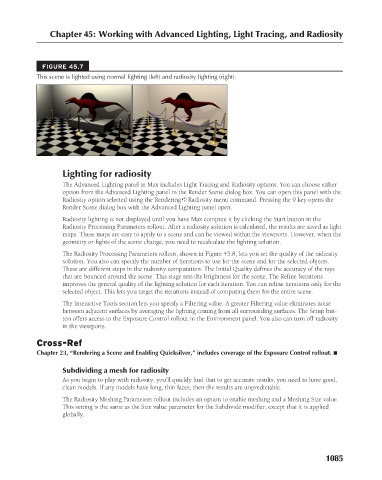
FIGURE 45.7
This scene is lighted using normal lighting (left) and radiosity lighting (right).
Lighting for radiosity
The Advanced Lighting panel in Max includes Light Tracing and Radiosity options. You can choose either
option from the Advanced Lighting panel in the Render Scene dialog box. You can open this panel with the
Radiosity option selected using the Rendering ➪ Radiosity menu command. Pressing the 9 key opens the
Render Scene dialog box with the Advanced Lighting panel open.
Radiosity lighting is not displayed until you have Max compute it by clicking the Start button in the
Radiosity Processing Parameters rollout. After a radiosity solution is calculated, the results are saved as light
maps. These maps are easy to apply to a scene and can be viewed within the viewports. However, when the
geometry or lights of the scene change, you need to recalculate the lighting solution.
The Radiosity Processing Parameters rollout, shown in Figure 45.8, lets you set the quality of the radiosity
solution. You also can specify the number of iterations to use for the scene and for the selected objects.
These are different steps in the radiosity computation. The Initial Quality defines the accuracy of the rays
that are bounced around the scene. This stage sets the brightness for the scene. The Refine Iterations
improves the general quality of the lighting solution for each iteration. You can refine iterations only for the
selected object. This lets you target the iterations instead of computing them for the entire scene.
The Interactive Tools section lets you specify a Filtering value. A greater Filtering value eliminates noise
between adjacent surfaces by averaging the lighting coming from all surrounding surfaces. The Setup but-
ton offers access to the Exposure Control rollout in the Environment panel. You also can turn off radiosity
in the viewports.
Cross-Ref
Chapter 23, “Rendering a Scene and Enabling Quicksilver,” includes coverage of the Exposure Control rollout. n
Subdividing a mesh for radiosity
As you begin to play with radiosity, you’ll quickly find that to get accurate results, you need to have good,
clean models. If any models have long, thin faces, then the results are unpredictable.
The Radiosity Meshing Parameters rollout includes an option to enable meshing and a Meshing Size value.
This setting is the same as the Size value parameter for the Subdivide modifier, except that it is applied
globally.
1085