
Page 30 - Peter Randall - The Craft of the Knot
P. 30
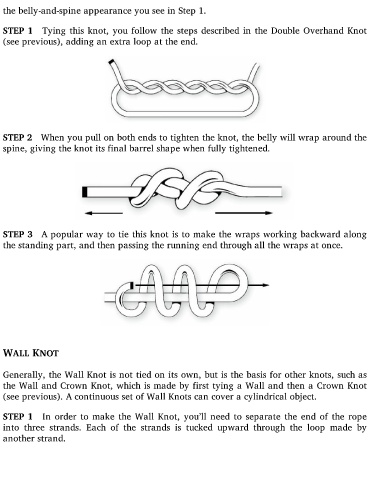
the belly-and-spine appearance you see in Step 1.


  STEP 1 Tying this knot, you follow the steps described in the Double Overhand Knot
  (see previous), adding an extra loop at the end.


  STEP 2 When you pull on both ends to tighten the knot, the belly will wrap around the
  spine, giving the knot its final barrel shape when fully tightened.


  STEP 3 A popular way to tie this knot is to make the wraps working backward along
  the standing part, and then passing the running end through all the wraps at once.


  WALL KNOT


  Generally, the Wall Knot is not tied on its own, but is the basis for other knots, such as

  the Wall and Crown Knot, which is made by first tying a Wall and then a Crown Knot
  (see previous). A continuous set of Wall Knots can cover a cylindrical object.


  STEP 1 In order to make the Wall Knot, you’ll need to separate the end of the rope
  into  three  strands.  Each  of  the  strands  is  tucked  upward  through  the  loop  made  by

  another strand.