
Page 54 - Patty Hahne "The Pocket Guide to Prepper Knots"
P. 54
3. Thread the working end down through the loop as illus-
trated in figure 13c.
Figure 13c.
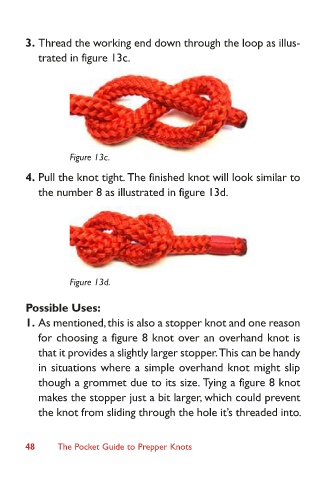
4. Pull the knot tight. The finished knot will look similar to
the number 8 as illustrated in figure 13d.
Figure 13d.
Possible Uses:
1. As mentioned, this is also a stopper knot and one reason
for choosing a figure 8 knot over an overhand knot is
that it provides a slightly larger stopper. This can be handy
in situations where a simple overhand knot might slip
though a grommet due to its size. Tying a figure 8 knot
makes the stopper just a bit larger, which could prevent
the knot from sliding through the hole it’s threaded into.
48 The Pocket Guide to Prepper Knots