
Page 20 - D. Raleigh "Knots and ropes for climbers"
P. 20
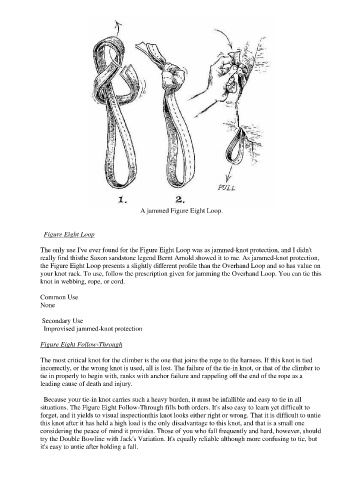
A jammed Figure Eight Loop.


                 Figure Eight Loop

               The only use I've ever found for the Figure Eight Loop was as jammed-knot protection, and I didn't
               really find thisthe Saxon sandstone legend Bernt Arnold showed it to me. As jammed-knot protection,
               the Figure Eight Loop presents a slightly different profile than the Overhand Loop and so has value on
               your knot rack. To use, follow the prescription given for jamming the Overhand Loop. You can tie this
               knot in webbing, rope, or cord.

               Common Use
               None

                Secondary Use
                 Improvised jammed-knot protection

               Figure Eight Follow-Through

               The most critical knot for the climber is the one that joins the rope to the harness. If this knot is tied
               incorrectly, or the wrong knot is used, all is lost. The failure of the tie-in knot, or that of the climber to
               tie in properly to begin with, ranks with anchor failure and rappeling off the end of the rope as a
               leading cause of death and injury.

                 Because your tie-in knot carries such a heavy burden, it must be infallible and easy to tie in all
               situations. The Figure Eight Follow-Through fills both orders. It's also easy to learn yet difficult to
               forget, and it yields to visual inspectionthis knot looks either right or wrong. That it is difficult to untie
               this knot after it has held a high load is the only disadvantage to this knot, and that is a small one
               considering the peace of mind it provides. Those of you who fall frequently and hard, however, should
               try the Double Bowline with Jack's Variation. It's equally reliable although more confusing to tie, but
               it's easy to untie after holding a fall.