
Page 54 - Norco Patient Orientation Handbook e-book
P. 54
indicator stays lit for more than 10 minutes, contact Norco. 4) When the cylinder is full the “Full” green
indicator will light. Detach cylinder by depressing the silver ring and lift up on cylinder. 5) Set conserving
device to prescribed flow. (See flow/time chart for tank times)
Explain that the filling process will take 2.5 hours for an M9 cylinder and 1.5hours for an M6 cylinder.
Discuss alarms and troubleshooting for the HomeFill™ compressor: 1) If the “Attention” alarm sounds
make sure that the cylinder is fully attached. Placing a cylinder >1500psi on the HomeFill™ unit will
eventually cause this alarm. Replace with an empty cylinder. If alarm persists, contact Norco.
Functional check schedule: quarterly
Preventive Maintenance schedule: Performed annually.
Demonstration for Portable Oxygen Concentrator (POC)
Discuss theory of operation: 1) POC will function in continuous and conserving mode(s) 2) Power options
include AC (outlet), car power adapter and internal/external batteries. 3) Discuss principle of operation
(identical to standard oxygen concentrator). 4) Continuous flows available from 0-3lpm. 5) Conserving
flows available from 0-6 on continuous models and 0-5 on conserving only models.
Ensure that concentrator is plugged directly into a properly grounded outlet.
POC will charge internal and external batteries from AC and car power adapter.
Demonstrate battery placement and location of charge status indicators.
Set liter flow to prescribed level and discuss alarms (if applicable).
Demonstrate proper placement of single or dual lumen nasal cannula.
Discuss battery times (see Oxygen Flow/Time Chart).
Demonstration for Liquid Oxygen
Explain theory of liquid oxygen: 1) LOX is -297F. Contact can cause severe burns 2) Discuss the advantage
of LOX over other oxygen systems (a) Functions from pressure, not electricity; (b) Portability, increased
portable tank times on continuous flow.
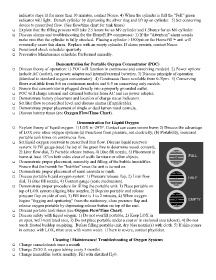
Set liquid oxygen reservoir to prescribed liter flow. Discuss liquid reservoir
system: 1) Fill gauge (read the top of the green line to determine vessel content),
2) Liter flow dial, 3) Portable release button, 4) Blue fill nozzle, 5) Placement in
home at least 18”on both sides clear of walls furniture or other objects.
Demonstrate proper placement, assembly and filling of the bubble humidifier.
Ensure that the humidifier “bubbles” once the unit is turned on.
Demonstrate proper placement of nasal cannula or mask.
Discuss portable liquid oxygen system: 1) Pressure release flap, 2) Liter flow
dial, 3) Blue fill nozzle, 4) Content gauge (scale mechanism).
Demonstrate proper procedure for filling the portable unit: 1) Place portable on
top of LOX system aligning blue nozzles, 2) Depress portable and release
pressure flap on side of unit, 3) Fill time is 1 to 2 minutes, 4) When oxygen
begins “fogging and sputtering” from the stationary, close pressure flap and
release oxygen portable by depressing release button on top of the unit.
Discuss portable tank times (see Oxygen Flow/Time Chart).
Discuss safety with liquid oxygen: 1) Do not overfill portable, 2) Keep LOX in
an open, well-ventilated area, 3) Do not place portable under a coat or in enclosed area (closet), 4) Do not
touch frosted buildup on piping. Before filling portable unit, dry blue nozzle(s) with cloth. 5) If skin comes
in contact with LOX, rinse area with warm water. If burn is severe, contact physician.
Cleaning / Maintenance/ Troubleshooting of Oxygen Systems
Change cannula/mask once a month
Change 25/50 ft. oxygen tubing every 3 months.
Change humidifier bottle monthly. Fill with distilled H 2O.