
Page 191 - Installation Training Binder FIT1-3
P. 191
Liner Preparation (Continued)
6. Place tape measurer on the ground for the “front” stanchions and measure from the
outside edge of the first stanchion all the way to the outside edge of the last stanchion
and leave the tape measurer in place.
7. On a piece of paper, write down the overall distance from the first stanchion to the last
stanchion. Divide that measurement by 2 and also write it down. (You have now
established the exact center of the rack stanchions) Example: If the overall stanchion
length is 58 3/8”, the center of the stanchions is 29 3/16”.
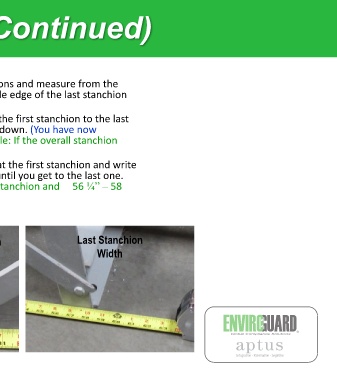
8. Making sure that the tape measurer has not moved, start at the first stanchion and write
down the measurements for the width of each stanchion until you get to the last one.
Example: 0”-2 ¼” first stanchion, 28 1/8” – 30 ½” second stanchion and 56 ¼” – 58
3/8” is the last stanchion.
NOTE**Insure all measurements are within a 1/16” “Heavy”
1 Stanchion 2 Stanchion Last Stanchion
st
nd
Width Width Width
Overall length to
Establish “center” of
Stanchions