
Page 1174 - Chief Architect Reference Manual
P. 1174
Export Chief Architect 3D Viewer File
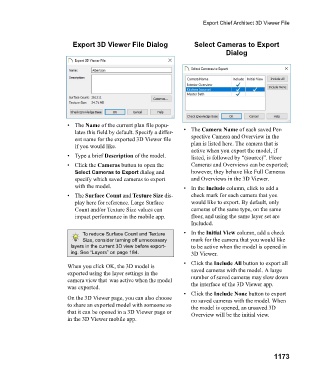
Export 3D Viewer File Dialog Select Cameras to Export
Dialog
• The Name of the current plan file popu-
lates this field by default. Specify a differ- • The Camera Name of each saved Per-
ent name for the exported 3D Viewer file spective Camera and Overview in the
if you would like. plan is listed here. The camera that is
active when you export the model, if
• Type a brief Description of the model. listed, is followed by “(source)”. Floor
• Click the Cameras button to open the Cameras and Overviews can be exported;
Select Cameras to Export dialog and however, they behave like Full Cameras
specify which saved cameras to export and Overviews in the 3D Viewer.
with the model. •In the Include column, click to add a
• The Surface Count and Texture Size dis- check mark for each camera that you
play here for reference. Large Surface would like to export. By default, only
Count and/or Texture Size values can cameras of the same type, on the same
impact performance in the mobile app. floor, and using the same layer set are
Included.
To reduce Surface Count and Texture •In the Initial View column, add a check
Size, consider turning off unnecessary mark for the camera that you would like
layers in the current 3D view before export- to be active when the model is opened in
ing. See “Layers” on page 184. 3D Viewer.
• Click the Include All button to export all
When you click OK, the 3D model is
exported using the layer settings in the saved cameras with the model. A large
camera view that was active when the model number of saved cameras may slow down
was exported. the interface of the 3D Viewer app.
• Click the Include None button to export
On the 3D Viewer page, you can also choose no saved cameras with the model. When
to share an exported model with someone so the model is opened, an unsaved 3D
that it can be opened in a 3D Viewer page or Overview will be the initial view.
in the 3D Viewer mobile app.
1173