
Page 730 - Chief Architect Reference Manual
P. 730
Chief Architect X10 Reference Manual
the terrain is up to date. See “Building the • Select the stairs or ramp, hold down the
Terrain” on page 1216. Alt key (or right-click), and drag an end
edit handle. See “Alternate” on page 209.
Straight Stairs and Ramps
The Draw Stairs tool can be used in two
different ways:
+ Alt
• Click and drag in a straight line to draw
stairs that are the length that you drag.
• Click once to place stairs that go from the
current floor up to the height of the next
floor level.
You can also click once using the Straight
Stairs tool to create stairs between rooms
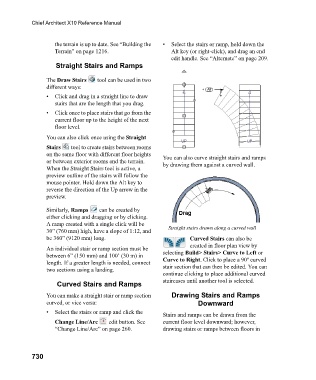
on the same floor with different floor heights You can also curve straight stairs and ramps
or between exterior rooms and the terrain. by drawing them against a curved wall.
When the Straight Stairs tool is active, a
preview outline of the stairs will follow the
mouse pointer. Hold down the Alt key to
reverse the direction of the Up arrow in the
preview.
Similarly, Ramps can be created by
either clicking and dragging or by clicking.
A ramp created with a single click will be
30” (760 mm) high, have a slope of 1:12, and Straight stairs drawn along a curved wall
be 360” (9120 mm) long. Curved Stairs can also be
created in floor plan view by
An individual stair or ramp section must be
between 6” (150 mm) and 100’ (30 m) in selecting Build> Stairs> Curve to Left or
length. If a greater length is needed, connect Curve to Right. Click to place a 90º curved
two sections using a landing. stair section that can then be edited. You can
continue clicking to place additional curved
staircases until another tool is selected.
Curved Stairs and Ramps
You can make a straight stair or ramp section Drawing Stairs and Ramps
curved, or vice versa: Downward
• Select the stairs or ramp and click the
Stairs and ramps can be drawn from the
Change Line/Arc edit button. See current floor level downward; however,
“Change Line/Arc” on page 260. drawing stairs or ramps between floors in
730