
Page 89 - New Hire Orientation Packet 6.17
P. 89
Time and Attendance: Editing Timecards
The next screen is where you will edit the timecard(s). To choose a different employee’s
timecard, select their name from the drop-down or to go to the next employee’s
timecard by simply selecting the “>” arrow button.
To select a different time period, choose the applicable period from the drop-down or
use the “Prev” and “Next” buttons to navigate to different timecards. The period will be
displayed at the top of the timecard.
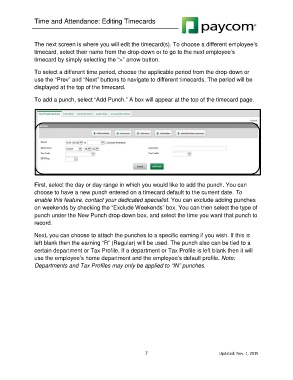
To add a punch, select “Add Punch.” A box will appear at the top of the timecard page.
First, select the day or day range in which you would like to add the punch. You can
choose to have a new punch entered on a timecard default to the current date. To
enable this feature, contact your dedicated specialist. You can exclude adding punches
on weekends by checking the “Exclude Weekends” box. You can then select the type of
punch under the New Punch drop-down box, and select the time you want that punch to
record.
Next, you can choose to attach the punches to a specific earning if you wish. If this is
left blank then the earning “R” (Regular) will be used. The punch also can be tied to a
certain department or Tax Profile. If a department or Tax Profile is left blank then it will
use the employee’s home department and the employee’s default profile. Note:
Departments and Tax Profiles may only be applied to “IN” punches.
7 Updated: Nov. 1, 2015