
Page 1143 - Adams and Stashak's Lameness in Horses, 7th Edition
P. 1143
Foot Care and Farriery 1109
is placed through a nail hole in a manufactured shoe,
the shank of the nail exits straight rather than being
VetBooks.ir the nail from gaining solid purchase and height within
angled to the slope of the hoof capsule. This prevents
the hoof wall. Low nailing is usually a precursor to
cracks and fissures in the hoof wall. This should and can
be easily corrected by re‐punching the nail hole at an
angle and by back punching the nail hole on the solar
surface of the shoe.
Back punching is accomplished by using a pritchel
placed on an angle adjacent to the inner side of the nail
hole and directed toward the outer side of the shoe. The
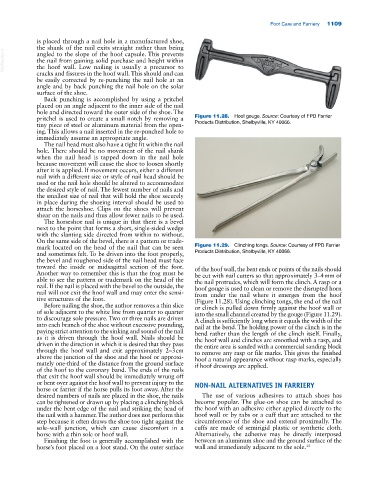
pritchel is used to create a small notch by removing a Figure 11.28. Hoof gouge. Source: Courtesy of FPD Farrier
tiny piece of steel or aluminum material from the open Products Distribution, Shelbyville, KY 40066.
ing. This allows a nail inserted in the re‐punched hole to
immediately assume an appropriate angle.
The nail head must also have a tight fit within the nail
hole. There should be no movement of the nail shank
when the nail head is tapped down in the nail hole
because movement will cause the shoe to loosen shortly
after it is applied. If movement occurs, either a different
nail with a different size or style of nail head should be
used or the nail hole should be altered to accommodate
the desired style of nail. The fewest number of nails and
the smallest size of nail that will hold the shoe securely
in place during the shoeing interval should be used to
attach the horseshoe. Clips on the shoes will prevent
shear on the nails and thus allow fewer nails to be used.
The horseshoe nail is unique in that there is a bevel
next to the point that forms a short, single‐sided wedge
with the slanting side directed from within to without.
On the same side of the bevel, there is a pattern or trade
mark located on the head of the nail that can be seen Figure 11.29. Clinching tongs. Source: Courtesy of FPD Farrier
and sometimes felt. To be driven into the foot properly, Products Distribution, Shelbyville, KY 40066.
the bevel and roughened side of the nail head must face
toward the inside or midsagittal section of the foot. of the hoof wall, the bent ends or points of the nails should
Another way to remember this is that the frog must be be cut with nail cutters so that approximately 3–4 mm of
able to see the pattern or trademark on the head of the the nail protrudes, which will form the clinch. A rasp or a
nail. If the nail is placed with the bevel to the outside, the hoof gouge is used to clean or remove the disrupted horn
nail will not exit the hoof wall and may enter the sensi from under the nail where it emerges from the hoof
tive structures of the foot. (Figure 11.28). Using clinching tongs, the end of the nail
Before nailing the shoe, the author removes a thin slice or clinch is pulled down firmly against the hoof wall or
of sole adjacent to the white line from quarter to quarter into the small channel created by the gouge (Figure 11.29).
to discourage sole pressure. Two or three nails are driven A clinch is sufficiently long when it equals the width of the
into each branch of the shoe without excessive pounding, nail at the bend. The holding power of the clinch is in the
paying strict attention to the sinking and sound of the nail bend rather than the length of the clinch itself. Finally,
as it is driven through the hoof wall. Nails should be the hoof wall and clinches are smoothed with a rasp, and
driven in the direction in which it is desired that they pass the entire area is sanded with a commercial sanding block
through the hoof wall and exit approximately 2–3 cm to remove any rasp or file marks. This gives the finished
above the junction of the shoe and the hoof or approxi hoof a natural appearance without rasp marks, especially
mately one‐third of the distance from the ground surface if hoof dressings are applied.
of the hoof to the coronary band. The ends of the nails
that exit the hoof wall should be immediately wrung off
or bent over against the hoof wall to prevent injury to the NON‐NAIL ALTERNATIVES IN FARRIERY
horse or farrier if the horse pulls its foot away. After the
desired numbers of nails are placed in the shoe, the nails The use of various adhesives to attach shoes has
can be tightened or drawn up by placing a clinching block become popular. The glue‐on shoe can be attached to
under the bent edge of the nail and striking the head of the hoof with an adhesive either applied directly to the
the nail with a hammer. The author does not perform this hoof wall or by tabs or a cuff that are attached to the
step because it often draws the shoe too tight against the circumference of the shoe and extend proximally. The
sole–wall junction, which can cause discomfort in a cuffs are made of semirigid plastic or synthetic cloth.
horse with a thin sole or hoof wall. Alternatively, the adhesive may be directly interposed
Finishing the foot is generally accomplished with the between an aluminum shoe and the ground surface of the
horse’s foot placed on a foot stand. On the outer surface wall and immediately adjacent to the sole. 15