
Page 313 - Divyank Tyagi
P. 313
|
The MAssing User inTerfAce And fUncTionAliTy 279
7. In the contextual tab of the ribbon, click Finish Mass.
8. Once again, return to the Massing & Site tab in the ribbon, and then click In-Place Mass.
Name the next mass Pyramid. For this shape, you will need to sketch a square in plan
and a triangle in elevation before you use the Create Form tool.
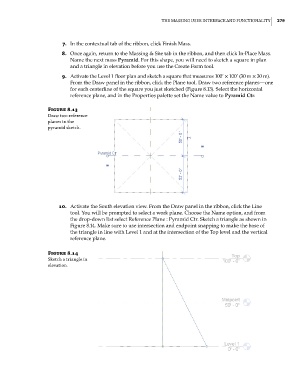
9. Activate the Level 1 floor plan and sketch a square that measures 100’ × 100’ (30 m × 30 m).
From the Draw panel in the ribbon, click the Plane tool. Draw two reference planes—one
for each centerline of the square you just sketched (Figure 8.13). Select the horizontal
reference plane, and in the Properties palette set the Name value to Pyramid Ctr.
Figure 8.13
draw two reference
planes in the
pyramid sketch.
10. Activate the South elevation view. From the Draw panel in the ribbon, click the Line
tool. You will be prompted to select a work plane. Choose the Name option, and from
the drop-down list select Reference Plane : Pyramid Ctr. Sketch a triangle as shown in
Figure 8.14. Make sure to use intersection and endpoint snapping to make the base of
the triangle in line with Level 1 and at the intersection of the Top level and the vertical
reference plane.
Figure 8.14
sketch a triangle in
elevation.
c08.indd 279 05-05-2014 16:47:32