
Page 314 - Divyank Tyagi
P. 314
280 | ChAPter 8 AdvAnced Modeling And MAssing
11. In a 3D view, click the Modify button in the ribbon. Select both the square and the
triangle, and then click Create From ➢ Solid Form from the contextual tab in the ribbon.
The Create Form command will detect that the most likely configuration of these two
2D shapes is to sweep the triangle along the square path, thus forming a pyramid. Click
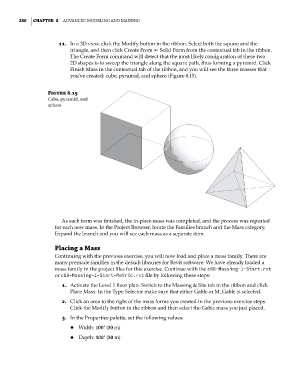
Finish Mass in the contextual tab of the ribbon, and you will see the three masses that
you’ve created: cube, pyramid, and sphere (Figure 8.15).
Figure 8.15
cube, pyramid, and
sphere
As each form was finished, the in-place mass was completed, and the process was repeated
for each new mass. In the Project Browser, locate the Families branch and the Mass category.
Expand the branch and you will see each mass as a separate item.
Placing a Mass
Continuing with the previous exercise, you will now load and place a mass family. There are
many premade families in the default libraries for Revit software. We have already loaded a
mass family in the project files for this exercise. Continue with the c08-Massing-1-Start.rvt
or c08-Massing-1-Start-Metric.rvt file by following these steps:
1. Activate the Level 1 floor plan. Switch to the Massing & Site tab in the ribbon and click
Place Mass. In the Type Selector make sure that either Gable or M_Gable is selected.
2. Click an area to the right of the mass forms you created in the previous exercise steps.
Click the Modify button in the ribbon and then select the Gable mass you just placed.
3. In the Properties palette, set the following values:
◆ Width: 100’ (30 m)
◆ Depth: 100’ (30 m)
c08.indd 280 05-05-2014 16:47:32