
Page 564 - Divyank Tyagi
P. 564
530 | ChaPTER 12 Creating Walls and Curtain Walls
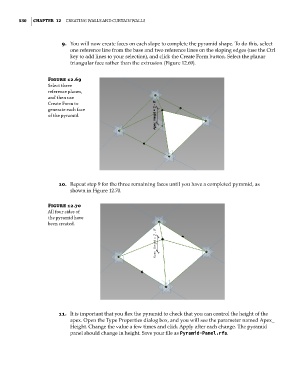
9. You will now create faces on each slope to complete the pyramid shape. To do this, select
one reference line from the base and two reference lines on the sloping edges (use the Ctrl
key to add lines to your selection), and click the Create Form button. Select the planar
triangular face rather than the extrusion (Figure 12.69).
Figure 12.69
select three
reference planes,
and then use
Create form to
generate each face
of the pyramid.
10. Repeat step 9 for the three remaining faces until you have a completed pyramid, as
shown in Figure 12.70.
Figure 12.70
all four sides of
the pyramid have
been created.
11. It is important that you flex the pyramid to check that you can control the height of the
apex. Open the Type Properties dialog box, and you will see the parameter named Apex_
Height. Change the value a few times and click Apply after each change. The pyramid
panel should change in height. Save your file as Pyramid-Panel.rfa.
c12.indd 530 5/3/2014 11:13:35 AM