
Page 28 - Parker - Assembly/Installation
P. 28
4300 Catalog Assembly / Installation
EO Assembly
EO Assembly
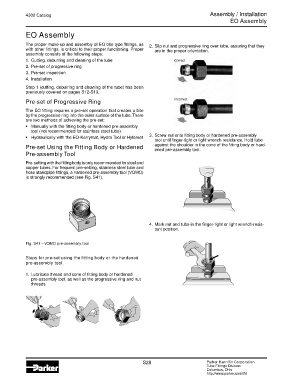
The proper make-up and assembly of EO bite type fittings, as 2. Slip nut and progressive ring over tube, assuring that they
with other fittings, is critical to their proper functioning. Proper are in the proper orientation.
assembly consists of the following steps:
1. Cutting, deburring and cleaning of the tube Correct
2. Pre-set of progressive ring
3. Pre-set inspection
4. Installation
Step 1 (cutting, deburring and cleaning of the tube) has been
previously covered on pages S12-S13.
Pre-set of Progressive Ring Incorrect
The EO fitting requires a pre-set operation that creates a bite
by the progressive ring into the outer surface of the tube. There
are two methods of achieving the pre-set:
• Manually with the fitting body or hardened pre-assembly
tool (not recommended for stainless steel tube).
• Hydraulically with the EO-Karrymat, Hydra Tool or Hyferset 3. Screw nut onto fitting body or hardened pre-assembly
tool until finger-tight or light wrench resistance. Hold tube
Pre-set Using the Fitting Body or Hardened against the shoulder in the cone of the fitting body or hard-
ened pre-assembly tool.
Pre-assembly Tool
Pre-setting with the fitting body is only recommended for steel and
copper tubes. For frequent pre-setting, stainless steel tube and
hose standpipe fittings, a hardened pre-assembly tool (VOMO)
is strongly recommended (see Fig. S41).
4. Mark nut and tube in the finger-tight or light wrench-resis-
tant position.
Fig. S41 – VOMO pre-assembly tool
Steps for pre-set using the fitting body or the hardened
pre-assembly tool.
1. Lubricate thread and cone of fitting body or hardened
pre-assembly tool, as well as the progressive ring and nut
threads.
S28 Parker Hannifin Corporation
Tube Fittings Division
Columbus, Ohio
http://www.parker.com/tfd