
Page 13 - DP Vol 19 No 2 HR_Neat
P. 13
for a period of 2 weeks each for
18-20 hours a day as per aligner
company protocol. The sheets
used were CA PRO PLUS and were
printed in SCHEU Biostar. The
patient was called for recalls every
month to check tracking of teeth
and fit of aligners. The desired
outcome was achieved within 40
weeks. The post alignment FIGs
show considerable expansion and
sufficient reduction in crowding
of lower anterior teeth. Following
this the attachments were
removed and removable retainers
given to be worn daily as we
proceeded with planned occlusal
rehabilitation. 3
STAGE ii - STAGED
OCCLUSAL
REHABiLiTATiON
After pre alignment was
completed, following chairside
deprogramming, fresh diagnostic
impressions, Facebow transfer
and photos were taken and sent to
the laboratory. (Precision Dental
Studio, Mumbai)1
With the help of extra oral and
intra oral photographs, a 2D Smile
Simulation was done adhering to
Golden Proportion. This help us
verify the size, shape and position
of teeth.
Upon agreement of Size, Shape
& Morphology of the design
file, the next step was to print a
diagnostic. 2
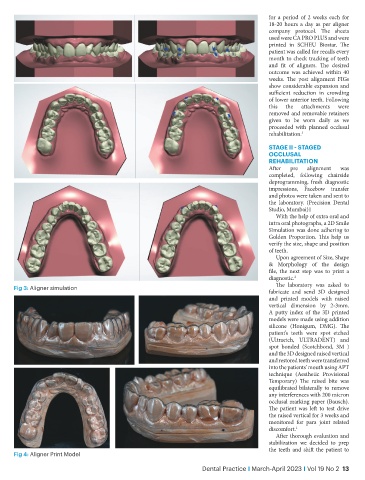
Fig 3: Aligner simulation The laboratory was asked to
fabricate and send 3D designed
and printed models with raised
vertical dimension by 2-3mm.
A putty index of the 3D printed
models were made using addition
silicone (Honigum, DMG). The
patient’s teeth were spot etched
(Ultraetch, ULTRADENT) and
spot bonded (Scotchbond, 3M )
and the 3D designed raised vertical
and restored teeth were transferred
into the patients’ mouth using APT
technique (Aesthetic Provisional
Temporary) The raised bite was
equilibrated bilaterally to remove
any interferences with 200 micron
occlusal marking paper (Bausch).
The patient was left to test drive
the raised vertical for 3 weeks and
monitored for para joint related
discomfort. 1
After thorough evaluation and
stabilization we decided to prep
the teeth and shift the patient to
Fig 4: Aligner Print Model
Dental Practice i March-April 2023 i Vol 19 No 2 13