
Page 155 - Photoshop for Lightroom Users – Scott Kelby 2nd Edition
P. 155
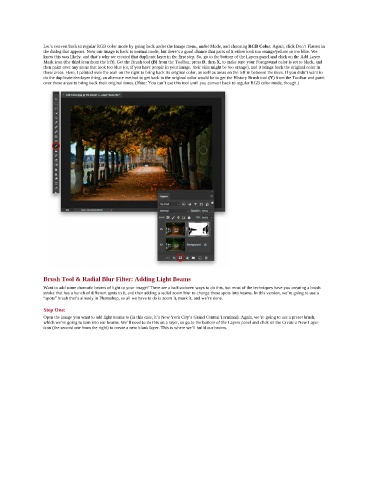
Let’s convert back to regular RGB color mode by going back under the Image menu, under Mode, and choosing RGB Color. Again, click Don’t Flatten in
               the dialog that appears. Now our image is back to normal mode, but there’s a good chance that parts of it either look too orange/yellow or too blue. We
               knew this was likely, and that’s why we created that duplicate layer in the first step. So, go to the bottom of the Layers panel and click on the Add Layer
               Mask icon (the third icon from the left). Get the Brush tool (B) from the Toolbar, press D, then X, to make sure your Foreground color is set to black, and
               then paint over any areas that look too blue (or, if you have people in your image, their skin might be too orange), and it brings back the original color in
               those areas. Here, I painted over the wall on the right to bring back its original color, as well as areas on the left in between the trees. If you didn’t want to
               do the duplicate-the-layer thing, an alternate method to get back to the original color would be to get the History Brush tool (Y) from the Toolbar and paint
               over those areas to bring back their original tones. (Note: You can’t use this tool until you convert back to regular RGB color mode, though.)


               Brush Tool & Radial Blur Filter: Adding Light Beams
               Want to add some dramatic beams of light to your image? There are a half-a-dozen ways to do this, but most of the techniques have you creating a brush
               stroke that has a bunch of different spots to it, and then adding a radial zoom blur to change those spots into beams. In this version, we’re going to use a
               “spots” brush that’s already in Photoshop, so all we have to do is zoom it, mask it, and we’re done.

               Step One:
               Open the image you want to add light beams to (in this case, it’s New York City’s Grand Central Terminal). Again, we’re going to use a preset brush,
               which we’re going to turn into our beams. We’ll need to do this on a layer, so go to the bottom of the Layers panel and click on the Create a New Layer
               icon (the second one from the right) to create a new blank layer. This is where we’ll build our beams.