
Page 158 - Photoshop for Lightroom Users – Scott Kelby 2nd Edition
P. 158
Step Six:
To make the beams of light brighter and more defined, simply duplicate the beams layer (Command-J [PC: Ctrl-J]). Just duplicating this layer has kind
of a “build-up” effect as semi-transparent pixels build up behind one another and it looks better and brighter. Now, let’s merge these two layers into one
single layer. Click on the top layer in the Layers panel, then press Command-E (PC: Ctrl-E) to merge this top beams layer with the original beams layer
on the layer below it. Still not done yet.
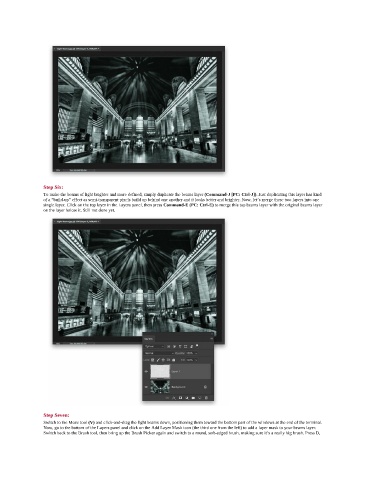
Step Seven:
Switch to the Move tool (V) and click-and-drag the light beams down, positioning them toward the bottom part of the windows at the end of the terminal.
Now, go to the bottom of the Layers panel and click on the Add Layer Mask icon (the third one from the left) to add a layer mask to your beams layer.
Switch back to the Brush tool, then bring up the Brush Picker again and switch to a round, soft-edged brush, making sure it’s a really big brush. Press D,