
Page 26 - Photoshop for Lightroom Users – Scott Kelby 2nd Edition
P. 26
Layers & Layer Opacity: Blank Layers and Using Opacity
Besides just dropping another photo on top as a layer or creating a Type layer (like we did in the previous project), sometimes you might want to use a
color-filled rectangle to create a backscreen, or paint on a layer with a brush, or add an icon or a graphic, or one of a hundred things you might want to do
on an empty layer. Here’s how to create a new blank layer and fill an area of it with a color, along with how to change the opacity of your layers (and why
you might want to):
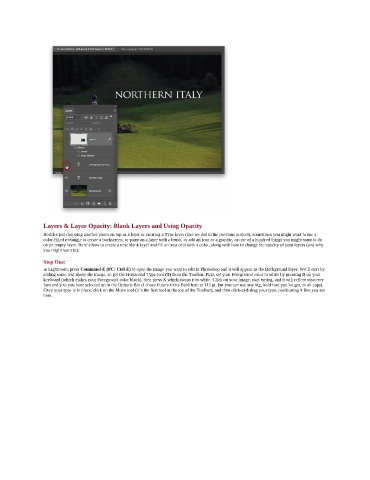
Step One:
In Lightroom, press Command-E (PC: Ctrl-E) to open the image you want to edit in Photoshop and it will appear as the Background layer. We’ll start by
adding some text above the image, so get the Horizontal Type tool (T) from the Toolbar. First, set your Foreground color to white by pressing D on your
keyboard (which makes your Foreground color black), then press X which swaps it to white. Click on your image, start typing, and it will reflect whatever
font and size you have selected up in the Options Bar (I chose Futura Extra Bold here at 115 pt, but you can use any big, bold font you’ve got, in all caps).
Once your type is in place, click on the Move tool (it’s the first tool at the top of the Toolbar), and then click-and-drag your type, positioning it like you see
here.