
Page 28 - Photoshop for Lightroom Users – Scott Kelby 2nd Edition
P. 28
D) to Deselect. This black bar is covering our Land of the Midnight Sun layer (because new layers are added above the active layer), so go to the Layers
panel and click-and-drag that black bar layer down below your Type layers, and now it appears behind your type.
Step Four:
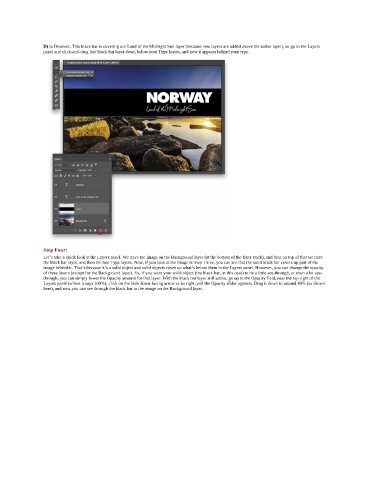
Let’s take a quick look at the Layers panel. We have the image on the Background layer (at the bottom of the layer stack), and then on top of that we have
the black bar layer, and then the two Type layers. Now, if you look at the image in Step Three, you can see that the solid black bar covers up part of the
image behind it. That’s because it’s a solid object and solid objects cover up what’s below them in the Layers panel. However, you can change the opacity
of these layers (except for the Background layer). So, if you want your solid object (the black bar, in this case) to be a little see-through, or even a lot see-
through, you can simply lower the Opacity amount for that layer. With the black bar layer still active, go up to the Opacity field, near the top right of the
Layers panel (where it says 100%), click on the little down-facing arrow to its right, and the Opacity slider appears. Drag it down to around 40% (as shown
here), and now you can see through the black bar to the image on the Background layer.