
Page 20 - The Decorative Painter Winter 2015
P. 20
ACRYLIC
Medium over the tail feathers to set the paint and let dry. Now use a no. 12 flat and Brown Earth to float shading on the yellow tail feathers in each section that dips. Use a no. 1 short liner and the Light Turners Yellow Mix to line between the yellow and blue tail feathers. Use a stylus and Warm White to add the cascading dots down each orange feather section.
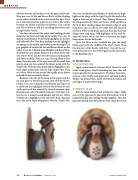
Use Fawn to basecoat the entire mini bowling pin that comprises the head and body of the turkey. Use a no. 10 domed round blender to drybrush highlights on the face and belly with Skin Tone Base, making sure the highlights are opaque in the middle and feather out on the edges. Use gray graphite to transfer the face and flower details on the turkey. Use a no. 6 domed round blender and Rose Pink to drybrush the rosy cheeks. Basecoat the whites of the eyes with Warm White. Use Burnt Umber to basecoat the pupils and flower on belly. Then use a no. 5/0 script liner to line down the outer sides of the eyes, and add the small dots next to each eye. Line around the flower petals with the Tingel’s Mix. With the same brush add the highlights to the outer edges of the petals with the Light Tingel’s Mix. Then use Warm White to line around the middle of the flower and add the dots around the flower.
Basecoat each side of the foam wattle pieces and the six-inch piece of twisted macramé cord with Red Earth. Let dry. Use a no. 6 domed round blender and Tiger Lily to drybrush the highlights towards the bottom of each wattle piece and also around the twisted macramé cord. Basecoat each side of the foam beak piece with Tiger Lily. Use the no. 6 domed round blender and Turners Yellow to drybrush a highlight on the end of the beak. Basecoat each side of the foam wing pieces with the Tingel’s Mix.
Use a no. 10 domed round blender to drybrush the high- lights on the wings with the Light Tingel’s Mix and let dry. Apply a thin coat of Jo Sonja’s Clear Glazing Medium to the wings and let dry. Next, use the no. 12 flat and Brown Earth to float shading along the bottom edge of each wing. Once dry, use the no. 5/0 script liner and add a bit of Warm White to the brush and mix, then line the swirl design onto each wing. Add highlights to the swirl de- sign with Warm White. Use Silver to basecoat the larger foam square for the hat buckle.
Once the Silver is dry, carefully hot glue the small black square onto the middle of the silver square. Then line the post of the buckle with Silver. Save all the cos- tume pieces for later, they will be glued to the nutcracker in the finishing steps.
FINISHING
VARNISHING
Apply several coats of Jo Sonja’s Matte Varnish to each of the wood pieces. Avoid varnishing any areas that will require glue for the costume pieces: Prudence: bow on le- ver area, wrists (cuffs), and upper chest and back (collar); Turkey: top of head (hat), under eyes (beak & wattle), and side edges of main body (wings).
TURKEY HAT
Roll the foam hatband and overlap the edges. Make sure it is the right size to place over the hat brim; trim if needed. Hot glue the overlapped edges together. Then hot glue the hatband onto the hat brim. Next, check the size of
18 The Decorative Painter • ISSUE NO. 4, 2015
DECORATIVEPAINTERS.ORG
