
Page 110 - Kitab3DsMax
P. 110
Part I: Getting Started with 3ds Max
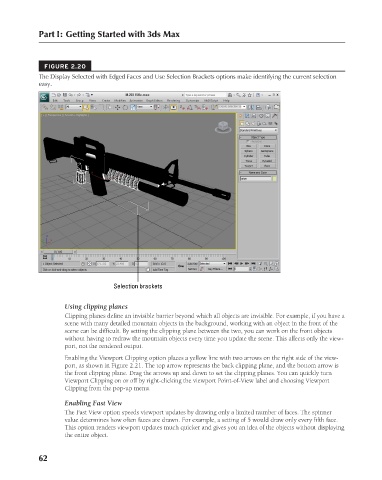
FIGURE 2.20
The Display Selected with Edged Faces and Use Selection Brackets options make identifying the current selection
easy.
Selection brackets
Using clipping planes
Clipping planes define an invisible barrier beyond which all objects are invisible. For example, if you have a
scene with many detailed mountain objects in the background, working with an object in the front of the
scene can be difficult. By setting the clipping plane between the two, you can work on the front objects
without having to redraw the mountain objects every time you update the scene. This affects only the view-
port, not the rendered output.
Enabling the Viewport Clipping option places a yellow line with two arrows on the right side of the view-
port, as shown in Figure 2.21. The top arrow represents the back clipping plane, and the bottom arrow is
the front clipping plane. Drag the arrows up and down to set the clipping planes. You can quickly turn
Viewport Clipping on or off by right-clicking the viewport Point-of-View label and choosing Viewport
Clipping from the pop-up menu.
Enabling Fast View
The Fast View option speeds viewport updates by drawing only a limited number of faces. The spinner
value determines how often faces are drawn. For example, a setting of 5 would draw only every fifth face.
This option renders viewport updates much quicker and gives you an idea of the objects without displaying
the entire object.
62
6/30/10 3:33 PM
07_617779-ch02.indd 62 6/30/10 3:33 PM
07_617779-ch02.indd 62