
Page 263 - Kitab3DsMax
P. 263
Chapter 7: Transforming Objects, Pivoting, Aligning, and Snapping
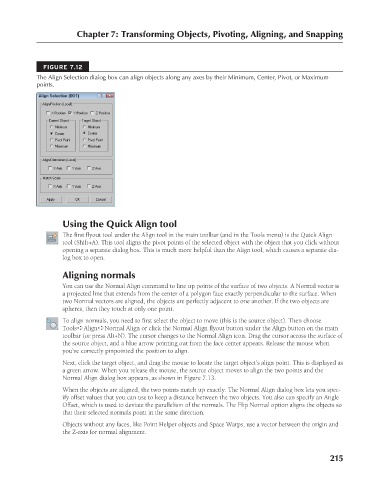
FIGURE 7.12
The Align Selection dialog box can align objects along any axes by their Minimum, Center, Pivot, or Maximum
points.
Using the Quick Align tool
The first flyout tool under the Align tool in the main toolbar (and in the Tools menu) is the Quick Align
tool (Shift+A). This tool aligns the pivot points of the selected object with the object that you click without
opening a separate dialog box. This is much more helpful than the Align tool, which causes a separate dia-
log box to open.
Aligning normals
You can use the Normal Align command to line up points of the surface of two objects. A Normal vector is
a projected line that extends from the center of a polygon face exactly perpendicular to the surface. When
two Normal vectors are aligned, the objects are perfectly adjacent to one another. If the two objects are
spheres, then they touch at only one point.
To align normals, you need to first select the object to move (this is the source object). Then choose
Tools ➪ Align ➪ Normal Align or click the Normal Align flyout button under the Align button on the main
toolbar (or press Alt+N). The cursor changes to the Normal Align icon. Drag the cursor across the surface of
the source object, and a blue arrow pointing out from the face center appears. Release the mouse when
you’ve correctly pinpointed the position to align.
Next, click the target object, and drag the mouse to locate the target object’s align point. This is displayed as
a green arrow. When you release the mouse, the source object moves to align the two points and the
Normal Align dialog box appears, as shown in Figure 7.13.
When the objects are aligned, the two points match up exactly. The Normal Align dialog box lets you spec-
ify offset values that you can use to keep a distance between the two objects. You also can specify an Angle
Offset, which is used to deviate the parallelism of the normals. The Flip Normal option aligns the objects so
that their selected normals point in the same direction.
Objects without any faces, like Point Helper objects and Space Warps, use a vector between the origin and
the Z-axis for normal alignment.
215
6/30/10 4:15 PM
13_617779-ch07.indd 215
13_617779-ch07.indd 215 6/30/10 4:15 PM