
Page 361 - Kitab3DsMax
P. 361
Chapter 12: Drawing and Editing 2D Splines and Shapes
Tip
Holding down the Shift key while clicking creates points that are constrained vertically or horizontally. This makes
it easy to create straight lines that are at right angles to each other. Holding down the Ctrl key snaps new points at
an angle from the last segment, as determined by the Angle Snap setting. n
After creating all the points, you exit line mode by clicking the right mouse button. If the last point is on
top of the first point, then a dialog box asks whether you want to close the spline. Click Yes to create a
closed spline or No to continue adding points. Even after creating a closed spline, you can add more points
to the current selection to create a compound shape if the Start New Shape option isn’t selected. If the first
and last points don’t correspond, then an open spline is created.
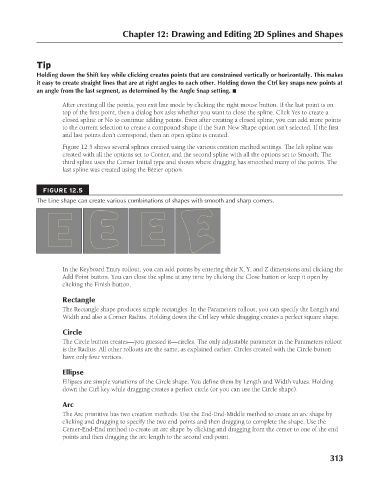
Figure 12.5 shows several splines created using the various creation method settings. The left spline was
created with all the options set to Corner, and the second spline with all the options set to Smooth. The
third spline uses the Corner Initial type and shows where dragging has smoothed many of the points. The
last spline was created using the Bézier option.
FIGURE 12.5
The Line shape can create various combinations of shapes with smooth and sharp corners.
In the Keyboard Entry rollout, you can add points by entering their X, Y, and Z dimensions and clicking the
Add Point button. You can close the spline at any time by clicking the Close button or keep it open by
clicking the Finish button.
Rectangle
The Rectangle shape produces simple rectangles. In the Parameters rollout, you can specify the Length and
Width and also a Corner Radius. Holding down the Ctrl key while dragging creates a perfect square shape.
Circle
The Circle button creates—you guessed it—circles. The only adjustable parameter in the Parameters rollout
is the Radius. All other rollouts are the same, as explained earlier. Circles created with the Circle button
have only four vertices.
Ellipse
Ellipses are simple variations of the Circle shape. You define them by Length and Width values. Holding
down the Ctrl key while dragging creates a perfect circle (or you can use the Circle shape).
Arc
The Arc primitive has two creation methods. Use the End-End-Middle method to create an arc shape by
clicking and dragging to specify the two end points and then dragging to complete the shape. Use the
Center-End-End method to create an arc shape by clicking and dragging from the center to one of the end
points and then dragging the arc length to the second end point.
313
6/30/10 4:20 PM
19_617779-ch12.indd 313
19_617779-ch12.indd 313 6/30/10 4:20 PM