
Page 133 - luminar 2018 - user manual pc v 2_3.pages
P. 133
Transforming a Layer
Once you’ve added a new layer to a document, it’s easy to transform it to a new size. The Free
Transform tool works similarly to the Crop Tool.
1. Click the + symbol at the top of the Layers panel and choose Add Image….
2. Navigate to a logo, watermark , or layer on your hard drive and click the Open button to add
the file to your document. The layer is automatically named with the filename of the
selected file.
3. To scale the texture, right-click on its thumbnail and choose Image Mapping.
4. To prevent unwanted distortion of the watermark or logo, choose Fit.
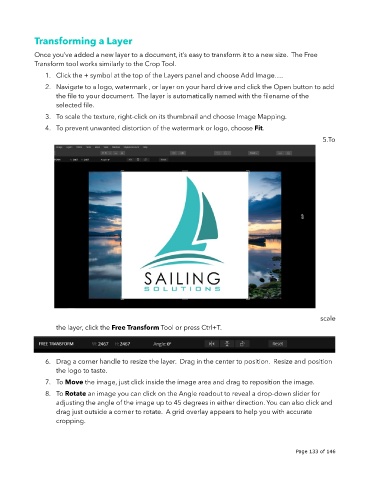
5.To
scale
the layer, click the Free Transform Tool or press Ctrl+T.
6. Drag a corner handle to resize the layer. Drag in the center to position. Resize and position
the logo to taste.
7. To Move the image, just click inside the image area and drag to reposition the image.
8. To Rotate an image you can click on the Angle readout to reveal a drop-down slider for
adjusting the angle of the image up to 45 degrees in either direction. You can also click and
drag just outside a corner to rotate. A grid overlay appears to help you with accurate
cropping.
!
Page 133 of 146
!